Category: Recipes

  • Birthday Dinner: Crab Bisque & Filet Mignon w/ Bernaise + Sweet Potato/Chard Gratin

    Birthday Dinner: Crab Bisque & Filet Mignon w/ Bernaise + Sweet Potato/Chard Gratin

    home made filet mignon with bernaise sauce

    Home made crab bisque with dungeness crab

    I hosted 8 (including myself) for dinner on Friday to celebrate my gentleman’s birthday; it was lively all night, everybody got full and we washed about 25 wine glasses. We drank champagne, prosecco, sparkling wine from california; we drank mouvedre from Chateau Margene, cuvee from Beckmen, a roussane blend from Tablas Creek–we had delicious wine, and the food came out great.

    Recipes to follow in the next day or two. I wish I’d taken a photo of the refuse after making the crab stock, it was a pretty mess in my backyard compost container.

  • St. Louis Style Cannelloni with Pork, Ricotta, & Chard

    St. Louis Style Cannelloni with Pork, Ricotta, & Chard

    cannelloni with ricotta, chard, and sausage

    This recipe will feed about 4 people with a side dish or 3 hungry people without one. It helps to have a food processor available.

    Filling
    2/3 lb spicy or sweet Italian pork sausage, out of casing
    3 cups chopped chard and/or spinach
    1 cup ricotta cheese (preferably sheep’s ricotta)
    1/2 yellow or white onion, diced

    Cook the sausage in a medium high heat skillet in a little chunks, seperating with your fingers, until brown on one side. Add the onions, and cook until mostly tender. Add the chard/spinich, and cook briefly until wilted. Allow mixture to cool slightly in pan or in thin metal bowl, and if you have one, use a food processor to make the mixture more even/fine. Once cooled to room temperature or close to it, add the ricotta and stir until blended. Adjust seasoning.

    Red Sauce
    1 container chopped or strained tomatoes (I used a carton of POMI)
    1 stick butter
    1/2 onion, peeled and intact

    Combine all ingredients in sauce pan and simmer until delicious. Add salt. About 30 minutes. Can make ahead.

    White Sauce
    1 T butter
    2 T flour
    1-2 cups milk
    salt & pepper
    1/2 tsp thyme or 2 tsp fresh thyme chopped

    Melt the butter until the water content has fizzled off, add the flour and whisk, cooking about 1 min until slightly darker. Slowly add milk until you have a nice, somewhat thick consistency sauce. Set aside. You’ll be reheating this shortly and possibly adding more milk to pour over the cannelloni.

    Pasta
    2 eggs
    00 white wheat flour if possible
    0 semola / semolina flour

    Use this recipe and roll out as thin as possible into sheets, cutting into strips about 10 inches long by 4 inches wide, roughly. It is ok if the sheets vary in size, so long as they’ll roll into a cannelloni giving it a few layers around. Boil water, add salt, and one at a time blanch the strips for 30 seconds or so, until they toughen up a bit. Remove, set on paper towels flat, not touching other pasta, in layers, to reserve for use.

    Alternatively you can buy cannelloni tubes from the grocery or lasagna sheets without the ruffles.

    Assembly

    Put a thin layer of red sauce in your baking/casserole dish to prevent pasta from sticking to bottom. Roll several spoonfuls of filling into each pasta sheet, placing each closely against the next in the dish. Once finished, top with red sauce thoroughly, then white sauce. Top with grated parmesan or asiago, bake at 375 for 25 minutes until golden and beautiful on top.

  • Thanksgiving Menu, Foodie Style

    Thanksgiving Menu, Foodie Style

    Persimmon slaw-style salad recipe photo

    pumpkin galette recipe photo

    *I’ve added photos of the spread above after the fact, and will be adding recipes over the next few days.

    This year, I’m hosting Thanksgiving. I’ve co-hosted in the past, but haven’t ever done the full-throttle. I’m expecting 8 guests, 3 of them being immediate family, one being a boyfriend, two being a pair of friends and another lone wolf friend. It should be a nice blast, this year more liberals than conservatives (traditionally, my brother and dad go at it on a team, I being the black sheep in the family and suffering the brute of the political banter).

    I’ll be serving I served:

    Persimmon slaw-style salad
    Haricot-vert with garlic, lemon zest
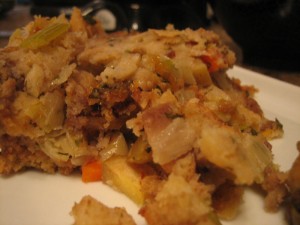
    Ina’s Sausage stuffing
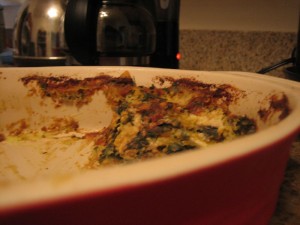
    Butternut Squash/Acorn Squash/Chard/Beet Green gratin (it is divine)
    Whipped sweet potatoes with orange and cream
    Fresh herb butter with delicious ACME bread
    Turkey breast; one lemon pepper, one smoky-sweet paprika
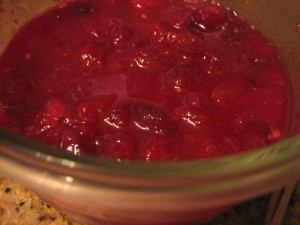
    Fresh cranberry sauce
    Fresh Pumpkin Galette with cocoa nibs & creme de cocoa/marscapone whipped cream (using this crust and a variation on this filling with less moisture)

    Missing recipes to come over the few days as I make them; If you’re a well-versed cook than can handle improvising on the missing ones (which are all quite simple), this is the plan I have for doing-ahead:

    Monday:
    wash/trim parsley, green beans
    cook sweet potatoes, reserve pulp
    make herb butter

    Tuesday:
    make cranberry sauce
    dry rub turkey
    chop & wash cabbage, reserve

    Wednesday:
    pick chard (from my garden)
    slice butternut squash for casserole
    prepare casserole, cook most of way, reserve
    make pumpkin galette
    make stuffing, cook most way, reserve

    Tday:
    chop persimmons in AM
    cook turkey
    reheat stuffing
    warm galette
    finish cooking casserole
    buy good bread
    set out butter in AM
    make green bean dish
    assemble slaw

  • Gorgonzola and Pear Gnocchi (Gnocchi alla Gorgonzola e Pera)

    Gorgonzola and Pear Gnocchi (Gnocchi alla Gorgonzola e Pera)

    Gnocci with Gorgonzola and Pears

    Gnocchi alla gorgonzola e pera is actually a pretty common dish in the northern half of Italy; the kind of thing any restaurant that might be serving tourists would throw on (without regard to seasonality, local cuisine, etc), and while that might turn you off, it’s actually quite good. That said, I ate it several places in Florence, and am fairly certain I spotted it on other menus around the way.

    I couldn’t find much on the history of this dish, so I think it’s more of a modern classic–prior to not-too-many-years-ago, most classic products of regions didn’t get transported or heavily used much in other regions. There was a time when gorgonzola is what you ate when you were in piedmonte; risotto is what you ate in Milan and in the far north, you ate potatoes in Alto Adige and maybe in Emilia-Romagna. Less so now, with the best of the best being desired by Italians everywhere loving food.

    Gnocchi is, however, typical of Alto Adige (where potatoes are most common), and gorgonzola–if it is officially DOP gorgonzola–is from Piedmonte. For this dish, you’ll want to use the opposite of what you’d likely want to snack on in a cheese plate. You’ll use Gorgonzola Dolce, which is the young, “sweet” gorgonzola. As the cheese ages it becomes more “piquante” or spicy, hot. It’ll tickle your throat if it’s the wrong type for this job. If you don’t have a quality cheese chop that carries both and can point them out, look for gorgonzola (imported, not pre-crumbled) that has a more soft, creamy texture with less blue bits–that’s usually it.

    For 3-4
    3 oz gorgonzola dolce cheeese
    1 ripe pear, diced
    1 T butter
    2 T flour
    1 cup light vegetable stock
    1/2 cup milk
    fresh gnocchi*
    salt, fresh ground pepper

    Boil your water and have it ready. If you are using fresh gnocchi (which you could be!), they require VERY little cooking time, take what you think they take and cut it by half. Seconds! Otherwise, they’ll fall apart, and you’ll regret it.

    Dice your pear, have your ingredients ready. You may or may not need slightly more or less veg stock & milk. Create a roux by heating the butter in a small sauce pan, until clear and stopped bubbling, medium heat. Add the flour and whisk until color darkens slightly, about 2 minutes. Continue whisking and slowly add the vegetable stock, then the milk, until you get a mac-n-cheese type consistency, or slightly thinner. Add the gorgonzola and continue whisking until smooth.

    Add the gnocchi to the water and cook; remove the gnocchi as soon as they float to the top of the pan using a slatted spoon or gnocchi paddle. Add the pear to the sauce and let it warm up, adding the gnocchi to the sauce and stirring gently to coat, with a large wooden spoon (don’t use metal, you’ll chop up the dumplings).

    Add some salt and black pepper to taste, serve!

    Fresh gnocchi makes a huge difference over the vaccu-packed kind you’ll find on the pasta isle. It’s much less dense and has the texture of a down pillow, collapsing in your mouth. I buy mine in bulk from Rainbow market or from Faletti Foods; both carry gnocchi by the bay area’s “Pasta Shop,” which lots of local stores retail products from.

  • Salmon Cream Cheese Wontons & Spicy Persimmon Slaw

    Salmon Cream Cheese Wontons & Spicy Persimmon Slaw

    home made salmon cream cheese wontons

    spicy persimmon cabbage salad

    Inspired by Wild Ginger in Cambria, CA, these wontons are tasty, filling finger food; the slaw helps to cut the fat and is a nice fall accompaniment. They’re also a really convenient way to use up any leftover wonton skins and leftover salmon.

    For 12-16 wontons

    Square wonton skins
    1/3 lb salmon, cooked (grilled, broiled, whatever)
    1/4 C cream cheese (I prefer Gina Marie from Sierra Nevada Cheese Co)
    1-2 tsp brown rice vinegar
    1/8 tsp five spice powder
    salt
    lots of safflower/sunflower/other high eat oil for frying

    Shred the salmon and mix with room temperature cream cheese. Add rice vinegar, five spice powder, and a pinch of salt to taste. Set aside for up to 2 hours or refrigerate up to 2 days ahead. Use 1T per wonton wrapper and moisten wrapper with spray bottle. Fold diagonally and seal, then bring end points together and seal. Fry at medium high heat, testing a piece of wonton skin first, until evenly golden.

    Spicy Persimmon Cabbage Slaw

    1/2 head cabbage, chopped somewhat finely
    1 persimmon, sliced thinly
    2 tsp gochujang or other chili paste such as harissa
    juice of 1 lime
    1/4 tsp ground cumin
    salt

    Whisk gochujang, lime juice, cumin and salt; toss cabbage and persimmon in mixture and let set 10 minutes before serving, or up to 1 hour.

  • Rancho Gordo Heirloom Bean Chili

    Rancho Gordo Heirloom Bean Chili

    home made chili with rancho gordo heirloom beans

    Delicious chili made from Rancho Gordo heirloom organic beans, adapted from Smitten Kitchen.

    olive oil
    2 large yellow or sweet onions, diced
    1 T minced garlic
    2 large carrots, cubed
    1 cup dry pinquito beans
    1 cup dry yellow-eye steuben heirloom beans (also rancho gordo but they aren’t selling them online! if you’re in SF try Rainbow’s bulk section)
    3 lbs ground beef, turkey, chicken, or pork (I used mostly beef/pork, but a little ground chicken too)
    1 green bell pepper
    1 red bell pepper
    4 T chili powder
    1 T cumin (ground)
    2 T paprika
    1 T dry oregano
    1 T chili flakes
    16 oz tomatoes chopped or stewed/pureed (I use POMI)
    2 C beef broth or veal stock
    1/4 C cider vinegar

    Garnish:
    Cheddar cheese, grated
    Red onion, diced

    Serve with macaroni  OR bread

    Beans: Soak the beans overnight in plenty of water. Do not soak more than 9 hours or they will probably burst. They may be mixed for soaking. Try to pre-cook ahead, but if not, start cooking the drained, rinsed, soaked beans in fresh water in a seperate pan as you begin making the chili. Cover and be sure they are cooking at at least a simmer, but not a boil. You want them tender before you add them to the chili at the end. They like to be cooked about an inch of water over the beans; just drain off the extra water if they’re cooked through.

    Chili: In a soup pot or dutch oven, heat a couple tablespoons of olive oil or butter. When hot, add diced onions. Cook until almost translucent, at medium heat. Add the garlic & carrots, cooking another 2-3 minutes. Add the meat, and let it cook through.

    While meat is cooking, dice your peppers and gather your other ingredients.

    When meat is cooked, add all of the spices. Cook 2-3 minutes. Add the tomatoes, beef stock, and vinegar. You may wish to reserve additional beef stock in case you prefer looser chili. Prepare your garnishes. Add the drained, cooked beans to the chili and you may serve in 10 minutes (simmering) or any amount of time after. The longer it sits, the better; I like to put the lid back on the pan and let it cool down very slowly, so that the flavors meld.

    Serve with cheddar and red onion on top.

  • Matsutake Mushroom Gnocci with Watercress

    Matsutake Mushroom Gnocci with Watercress

    Preface: The only other context I’ve eaten matsutake is in dashi and in a quesadilla (a delicious quesadilla). I don’t think I would make this dish exactly the same next time; I think it would be better in more broth, without the creme fraiche, with egg noodles (Asian style). I used really good quality, fluffy, fresh gnocci for this dish and I think it was really competing with the matsutake, which is a shame because they should have been the feature of the dish.

    matsutake gnocci with watercress

    matsutake mushrooms cooking

    Luckily, matsutakes had a bumper crop this year and they were only $20/lb. In SF, they can be found for $40 or more most years, so this was a really nice surprise last time I popped in at the Japanese market. Yesterday, I even saw them at Rainbow Foods!

    I do think simmering the matsutakes in dashi (it was small amounts of mirin, soy sauce, sake, walnut oil and then a larger amount of straight up dashi–water infused with kombu and i-forget-the-name tuna flakes) worked well, I just would have made more of it next time and omitted the creme fraiche I added. The watercress also worked well. So go ahead and do that, and sub those gnocci for egg noodles and I’m pretty sure you’ll have a delicious meal.

    Anyway, no recipe here since I won’t stand behind it, but thought you might learn from my experience.

  • Shrimp & Grits

    Shrimp & Grits

    [donotprint]home made gourmet shrimp and grits with chard

    A friend and I stopped by Farmer Brown for a late night meal after seeing a play about a week ago and we had some shrimp & grits. Created a little inspiration.

    Had a little panic, though. I canned my own tomatoes this summer with just some fresh lemon juice; a coworker and I were talking about canning techniques and she mtnioned she would not can her own tomatoes especially without preserved lemon juice because of the variation in pH in fresh lemons, due to the botulism risk.. I felt like a bit of a dummy. I took chemistry, why’s my brain not thinkin?

    At any rate, I ran out of tomatoes and really had to break open that jar and had myself all hyped up that we might start having lazy eyes and collapsing lungs within a day or two, but it’s been a few and we’re fine. I did throw the rest of the jar away, kinda regretting that now, and what we did eat would have been totally worth it because it was totally tasty.

    Here’s my version.[/donotprint]

    Shrimp and Grits
    For four

    1 C polenta
    1 C chopped tomatoes, strained tomatoes, or 2C fresh tomatoes chopped and seeded
    1 tsp dry thyme or 1 T fresh thyme
    1/2 tsp chili flakes
    1/4 C vegetable stock
    16 18-20 count shrimp (prefer blue Mexican prawns), deveined and shell removed completely
    2 C chopped fresh spinach
    salt

    Cook the polenta using a 1-3 ratio with water or stock. Be sure to bring liquid to boil first, evenly cipher in the polenta and continue stirring on low heat for at least 5-6 minutes until creamy and thick.

    In a sauce pan bring the tomatoes to a simmer and add the chili flakes, thyme, and veg stock. Reserve some veg stock in case you need to thin the sauce. Let it reduce to a tasty, rich flavor and add the shrimp to cook. Add the spinach, turning off the heat and throwing a lid on the pan for 30 seconds or so to wilt. Serve on top of the polenta in a bowl.

  • French Onion Soup

    French Onion Soup

    home made french onion soup

    french onion soup cooking in cast iron enameled pot

    6 large onions of mixed variety (mostly sweet yellow, but mix in some shallots, white onions, vidalia, etc)
    2 qts beef stock or veal stock
    2 beef bouillon cubes
    2 tsp dried thyme or lots of fresh thyme
    1 T butter
    2 large beef short ribs (optional)
    1/4 C white wine (optional)
    lots of salt
    nice bread
    gruyere cheese

    Slice your onions thinly;  if you have a mandolin use it to save time. Try to keep some longer strands along with some smaller ones.

    Begin by melting the butter in a large soup pot or dutch oven at medium high heat, then (if using them) add the salted short ribs, browning on each side. When finished browning, remove ribs and set aside, add 1/4 C white wine to deglaze, (if you are not using ribs, continue here) then add the onions with 1-2 T kosher salt (a lot less if you are using iodized for some inexcusable reason) & the thyme, then reduce heat to medium low. Cook the onions at least 1 hour until limp and golden, and sweet to taste.

    Add the ribs, stock, and bouillon cubes to the pot. Cover and cook at medium low or low for 1-2 hours. Remove ribs and seperate the meat, adding back to the pot in small pieces. Chop if necessary, removing large pieces of fat or other matter. Test for seasoning and add salt if needed.

    If you do not have ramekins or other fire-safe serving ware, you’ll want to prepare the bread separately. Heat the oven to 400, slice the bread and top with gruyere. Cook about 10 minutes, until bubbly and golden. Place on top of the soup when serving.

    If you do have ramekins, add the soup to them, a piece of bread to fit the top, and top generously with grated gruyere cheese, placing under the flame of your broiler until bubbly and golden.

  • Red Velvet Macarons & Thank You Gifts

    Red Velvet Macarons & Thank You Gifts

    red velvet french macarons made with italian method

    Another round of macarons..using the Italian method. Admittedly, I was a little rushed and a little lazy piping this out, so they are a bit unevenly sized.

    Basic French Macarons (Italian Method)

    Part One
    1 1/2 C powdered sugar (168 grams)
    1 1/2 C Almond flour (or other nut flour; 168 grams)
    2 large egg whites (55 grams)
    Any extracts (use sparingly, 1/4 tsp or less), cocoa powder, or food colorings are added in this stage

    Part Two
    2 large egg whites (55 grams)
    3/4 C granulated sugar (150 grams)
    1/4 C water

    Equipment
    Stand mixer (If you choose to use a hand mixer I recommend having four hands, or you will find this to be a pain.)
    Candy thermometer or good probe thermometer
    Piping bags (1 large, one smaller for the icing; I prefer to use one with a coupler)
    3/8 plain piping tip
    Non-temperamental oven, or oven thermometer and hawk eye

    Line 2 baking sheets with silpats or parchment; You may want to create a template to place below the parchment when piping of 1 inch circles. Prep your large piping bag with the tip, using a coupler or not. Preheat the oven to 275 F.

    Place two egg whites in bowl of the stand mixer and add the whisk attachment. Plug the beast in.

    In a bowl, preferably with a flat bottom, mix the powdered sugar and almond flour well. Add any powders such as matcha or cocoa at this time. For RED VELVET cookies/chocolate cookies, add 20 grams cocoa powder as a replacement for some powdered sugar. Always replace powdered sugar with dry flavorings in order to keep the balance of the batter. Add the egg whites and any food coloring and extracts such as vanilla, almond, etc. Mix into a paste with a large spatula, until it shows even color.

    In small saucepan on medium heat, bring water and sugar to a boil. Place the thermometer in the pan from the get-go, when it gets to 226F, begin whipping the egg whites on high. When the sugar reaches 230 (egg whites should be a bit foamy), remove it from the flame and add the liquid slowly to the whipping egg whites to create an Italian meringue. Continue whipping until the bowl is cool to touch, about 8 minutes or so, depending on the temp of the room.

    Fold the cooled meringue into the almond mixture. Notice that the batter looks like shiny plastic; watch for it to look like wet plastic shortly after the ingredients are combined. Be sure not to stir the batter, but to fold* cutting in and rotating the bowl. When it looks shiny, stop, and put it in the piping bag.

    *Find a youtube video on this if you aren’t sure how. The videos are all wrong, I just looked. None of them are quite right. The main thing is to put your spatula in vertical, like a knife. Then, pull it through along the side of the bowl and around, gently turning it over the center and letting the batter you scooped drop. Rotate the bowl 1/4 and cut into the center and do it again. Rinse and repeat. It’s important.

    Pipe them out into even 1-inch circles spaced 1 inch apart. Bake for 12-20 minutes; Mine took about 14. Check every 2 minutes after the first twelve by touching the top of the macaron with a flat finger and trying to shake it. The cookies are done when the top moves just a little against the ruffle.  Let them cool a minute or two before attempting to remove with a small, sturdy metal spatula. They taste best if you stick them in the fridge covered overnight, or even the completed cookies this way. They’re good up to five days, and the cookies without filling can be frozen.

    Cream Cheese Icing for Red Velvet Macarons
    4 oz cream cheese room temp
    1/2 stick butter room temp
    1/2 lb confectioners sugar
    1/2 tsp vanilla

    Mix butter and cream cheese – whip 30 seconds or so. Slowly add sugar with a hand mixer on low, scrape sides once in a while. Add vanilla and blend until fluffy, 1 minute.

    Italian Buttercream Icing – Great standard macaron filling
    2 egg whites (55 grams)
    1/3 cup plus 1 tbsp granulated sugar
    60g unsalted butter at room temp, roughly diced (just less than a 1/2 stick)

    Whisk together the egg whites and sugar. Set the bowl bain-marie style (over a pot of simmering water) and heat the mixture, whisking often, for 3-5mins until the  sugar has dissolved.

    Remove from heat and whisk on high speed with a hand mixer until it is stiff and shiny, similar to the Italian meringue made for the macarons. Add the butter slowly, one cube at a time, and continue to mix till all the butter is combined. Add any flavorings and refrigerate to firm up to use in a piping bag.

    You can flavor and color this icing many different ways; try adding some green tea powder when the sugar is melting, or some food coloring once it’s whipped up.

    ligurian olive oil

    & Thank you gifts! I hosted my old roommate (of Tuscany Road Trip 2006 fame) & her friend a few weeks ago; recently a surprise package arrived! She sent me delicious fig balsamic and extremely hard-to-get-my-paws-on Ligurian Olive oil!! Way to bring back awesome times, K! I spent lots of weekends in Cinque Terre when I lived in Florence, and it just brought back amazing culinary memories. I can’t wait to use it.