Author: Caroline

  • Pulled Pork

    Pulled Pork

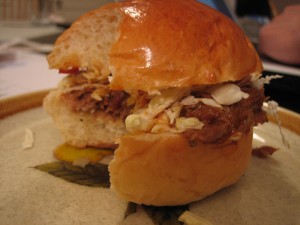
    Let’s talk about comfort food. I took on my first porkroast after a pretty intense craving for some pulled pork mustered up a few days ago after having an extremely delicious pulled pork slider at the Alembic in the Haight-Ashbury neighborhood near my house. Maybe it was the magic of the cocktails along with it (perhaps the best blood & sand I’ve ever had!), or the horseradish mayo on the sweet, soft bun, but I was left wanting more. Not surprisingly, this 6-hour roast became my project a few Sundays ago.

    3-3.5 lb pork shoulder/pork butt
    1T oregano
    1T paprika or smoked spanish paprika
    4T brown sugar
    1T cayenne/chili powder or more
    2 tsp salt
    2 tsp fresh cracked pepper
    2 tsp garlic powder or garlic salt
    BBQ sauce – vinegar based, spicy
    BBQ sauce – sweet with molasses

    Buns – I grabbed mine from the Japanese bakery

    Buy good quality meat; if it does not come deboned and tied up, use cooking twine to pull it back together. Mix the spices (if you don’t have all on hand and won’t reuse the individual spices if you were to buy them, Penzey’s makes a similar mixture that should suffice, perhaps with the addition of a little more chili heat and brown sugar, which you can add on your own. Be sure to get plenty though, as you want to be generous with the rub) and rub onto the meat, wrap up and let sit overnight in the fridge or up to 2 days.

    Heat oven to 300 degrees. Place pork into a ceramic or glass container that fits it but is not excessively large. Cook for 3 hours.

    After 3 hours, begin basting the pork every 20 minutes or so with bbq sauce (spicy for 2x more than molassas) and its own drippings for another 3- 3 1/2 hours.

    Cut off strings and pull with two forks into bits to save. When serving, mix in more warm bbq sauce of your choosing.

  • Burdock & Pork Miso Soup

    Burdock & Pork Miso Soup

    Burdock root, Japanese leek, thinly cut pork, tofu, mitsuba & mixed miso with kelp dashi

  • Breakfast on Sunday for Two: Pumpkin Seed omlette & Southern Biscuits

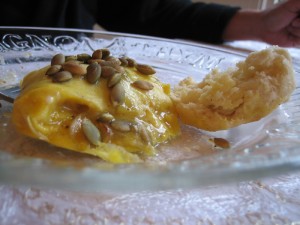
    Breakfast on Sunday for Two: Pumpkin Seed omlette & Southern Biscuits

    Southern Biscuits

    Make your biscuit dough and shape them and get them in the oven before starting the omlette, assuming you are not world’s slowest prep artist.

    4 eggs, whisked with salt & fresh cracked pepper

    1/4 small onion, sliced lengthwise thinly

    2 small French red fingerling potatoes, about 3-4 oz, diced/small cubes

    1/2 T butter

    1 inch block of gruyere or other cheese, grated into ribbons

    2-3 T raw pumpkin seeds, toasted over medium heat and set aside

    Sautee the onions in the butter. When starting to sweat, add the potatoes, about 1 min later. Add a light sprinkling of kosher salt. Cook until potatoes are gaining color, and put into bowl to reserve. Put the pan back on the heat and put to low heat.

    Cook the eggs. Let them set once, and then stir them and redistribute while enough uncooked egg remains to create a base layer. Cook another 1-2 minutes and add the potato and onion, and then the cheese.

    I also added a green salsa from a local Mexican restaurant at this point. It’s spicy and tangy with lime.

    Fold the egg miture over into a half circle and cover lightly with a lid, keeping at low heat to cook through without coloring the eggs or stiffening them.

    When done, top with salsa and pumpkin seeds and serve with biscuits and jam. We had apricot rose jam today from Arbo.

  • Broccoli Slaw Sesame Salad & Impatient Pickles

    Broccoli Slaw Sesame Salad & Impatient Pickles

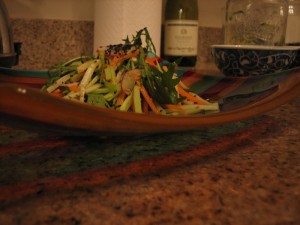
    Broccoli Slaw Sesame Salad

    1 stalk broccoli, stem only
    1 small bunch mizuna, about 20 stems of different sizes
    2 spring carrots, medium-small
    2 radishes
    1 1/2 tsp toasted sesame oil
    2 tsp seasoned rice vinegar
    1/2 tsp gomashi
    1tsp black sesame seeds

    Wash all vegetables and peel the carrots as well as any easy areas of the broccoli stem. Cut both into julienne as best you’re able.

    Wash & pat dry the mizuna, trimming excess stems. Wash & slice radish into even pieces, either julienne or in half rounds.

    Whisk the oil, vinegar, and gomashi together. If you don’t have gomashi, crush sesame seeds with the back of a knife or in a mortar & pestal and mix with some salt. Coat the vegetables in the dressing and top with black sesame seeds when serving.

    Impatient Pickles (quick Japanese pickle)

    1 Japanese cucumber or equivalent other cucumber (seed other types, but not Japanese cucumber)
    1 square kombu (1×1 inches or so, can use some you used to make stock, no problem; this is a type of kelp used to make stocks and other dishes in Japanese cuisine)
    1/4 small head of Napa, Chinese, or Savoy Cabbage, sliced thinly and washed
    Pinch salt

    Add a pinch of salt to the cabbage once it’s sliced and let it sit while you chop the cucumber.

    Prep your cucumber by slicing off the ends. Use a lot of salt in your hands to rub the cucumber vigorously; the salt will turn green and a bit of foam will appear. This is normal. Supposedly, it removes bitterness from the vegetable. Rinse it and pat it dry, then cut it into julienne by slicing dramatic diagonal ovals and then chopping them longways to have sticks with green tips.

    Mix everything together with your hands, using a light and then a firmer touch to squeeze moisture out of the vegetables. Leave the moisture in the bowl, you’ll use it. When the vegetables are flexible and soft, add the kombu. Put it in a jar with a tight fitting lid or otherwise in a ceramic or glass container with a lid and let it sit at room temp for 1 hour or in the fridge for up to 3 days with the kombu. Remove the kombu and store it another 2 weeks if you want to, assuming it doesn’t smell or look funny.

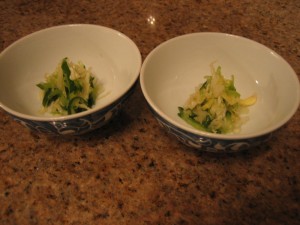
    Serve in small clumps in bowls.

    You can add radish or carrot or substitute it as well.

  • Miso Black Cod & Winter Flatbread

    Miso Black Cod & Winter Flatbread

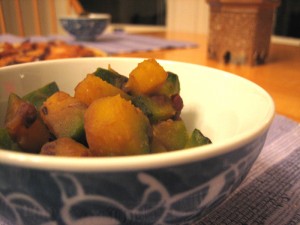
    Winter Flatbread with potato & butternut squash

    Winter Flatbread & Miso Black Cod

    Miso Fish (black cod)

    Pizza dough

    1/4 lb french fingerling (red) potatoes, cut into rounds 1/4 or less thick
    1/4 lb butternut squash flesh, cubed or sliced  1/4 inch thick and cut into chunks
    olive oil
    garlic

    Roast garlic cloves in oil in the oven, and remove when soft but not deeply colored or dried out. Puree in small food processor or with mortar & pestle. This will be spread over your pizza skin.

    In a nonstick pan, use a bit of oil to cook the potatoes & squash, covering to cook through if necessary. Reserve. I used leftovers from another meal, so it’s fine if they are cold when you use them.

    Preheat oven to as hot as it will go and be sure your pizza stone is clean. If you don’t have a pizza stone, place skin on a cookie sheet preferably without edges and “dock” the skin with a fork to allow air to circulate better and crisp it while cooking.

    Instead of rolling out your pizza dough, use your fingers to create a thin but mostly even center, leaving an edge that is thicker.

    Spread the garlic oil & garlic over the skin evenly and randomly scatter the cooked potatoes & squash. Cook until golden, 3-6 minutes depending on oven temperature. Cut into wedges.

    If you’re feeling fancy, throw some fresh chopped herbs on it when it comes out (thyme or basil would be great) of the oven, and dab the edges with a bit of olive oil.

  • Going Japanese: Miso Marinated Black Cod, Carrots & Konnyaku in Tofu Sauce

    Going Japanese: Miso Marinated Black Cod, Carrots & Konnyaku in Tofu Sauce

    Saikyo Yaki & Konnyaku to Ninjin no Shira ae

    Miso Marinated Broiled Black Cod

    Carrots & Konnyakku in Creamy Tofu Sauce

    I’ve had a fabulous traditional Japanese cookbook for some years now, never really venturing into it. I was interested in it because an old friend used to cook, by nature, a lot of fusion food, and I loved the yuzu citrus so much that I”d go to the Japanese market in Berkeley with some regularity. Now that I live in SF, I have all the expanse of the Nijiya supermarket in Japantown, among other resources.

    I’m not inclined to post a lot of the recipes, because they’re complicated, and require making sauces and broths and other things before cooking your actual item, but also because for most people, it will be difficult to find the ingredients.

    That said, Japanese food photographs beautifully, and I hope to integrate some of the techniques and ingredients I am learning about into my more improvisational cooking in the near future.

    Julienned Carrots

    Marinating Yuzu Miso Fish

    Miso Fish

    – Best to use Salmon or Black Cod/other oily fish

    – Marinate for 1.5 lbs of fish; I like to do this on Saturdays or Sundays and use it throughout the week; later in the week the flavors are stronger so it’s best to use the cod last as the marinade will remove some of the oily, fishy flavors.

    -Marinade must be applied for at least 1 day in fridge or up to 5

    Cheesecloth or Japanese cooking cloth
    3/4 cup light colored, sweet miso
    1-2 T mirin
    1 T freeze dried Yuzu peel, zest of 1 fresh yuzu, or zest of 1-2 fresh lemons or limes

    Mix all ingredients together thoroughly. Wrap each piece of fish in 1-2 layers of cheesecloth or 1 layer of Saryachi cloth. Paint the marinade on TOP of the cloth, not touching the fish directly. Layer neatly and reasonably tightly (without aggrevating the fish flesh) into a glass, ceramic or plastic container with a lid. Coat each side of the fish and continue layering. It is OK to mix fish types in the same container.

    To cook, after marinated at least 1 day in refrigerator, remove cheesecloth and scrape any clumps of marinade off the fish. Put into small foil pan or other pan that is broiler safe with skin side up. Broil for 2-4 minutes, until skin is crisped and blackened. Flip, and cook until colored and cooked through under broiler.

    I like to serve this with something acidic, like a simple salad or impatient pickles, and sometimes some miso soup as well.

  • Sunday’s Champagne Brunch – southern biscuits, winter fruit salad, kale gratin

    Sunday’s Champagne Brunch – southern biscuits, winter fruit salad, kale gratin

    A friend is moving back to her native Sicily and I hosted a brunch for her yesterday. There were 7 of us and our menu was:

    – Butternut Squash & Kale gratin

    – Southern Biscuits

    – Trio of amazing fruit preserves

    – Crispy Bacon

    – Winter Fruit Salad

    – Soft Scrambled Eggs

    And a dear friend showed up with not only bubbly, guava, and peach juice, but also a big thing of tortellini salad. Thanks Lauren! (MR. Y finished it off after the movie!)

    I’m not going to preach on the easiest of this list of dishes–a quick note about bacon and eggs.

    Scrambled Eggs. The key to your success is low heat and lots of stirring. You know what most recipes tell you to do with risotto? Don’t do that with risotto. Do it with eggs. They will take longer, but they will not taste like you made them in the microwave.

    Bacon should be served crispy and taken out of the pan just before you think it looks crispy. It’ll get there.

    My no-fail recipe for Southern Biscuits comes from Alton Brown. Don’t try to outdo it, you won’t. I follow it to a T and end up making it several days in a row after reviving it for an occasion. In fact, I’m going to go buy more flour as soon as I finish writing this. I served them with fig-almond spread, plum preserves and peach preserves from local frog hollow farms. You can buy the latter ones on their website.

    Winter Fruit Salad (adapted from Smitten Kitchen)

    3/4 Cup sugar
    1/2 vanilla bean
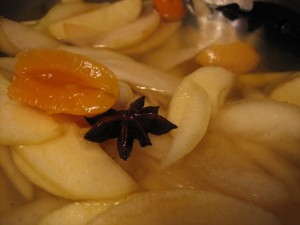
    3 star anise
    zest of 1 lemon
    10-12 dried apricots, sliced in half
    Juice from the same lemon
    3 firm pears of any variety (I used Comice, Bosc, and D’anjou)
    1 tart apple

    Bring 4 cups water and sugar to boil with star anise, vanilla bean. Add lemon zest and dried apricots, and let cool completely. Meanwhile, peel all of your remaining fruits and remove the cores (the easiest way to remove the core of an apple is to quarter it, and turn each quarter on its side, slicing diagonally the core area off). Slice the fruit thinly and evenly and toss in the lemon juice. When syrup is cooled, gently mix all together, cover, and store 8 hours or overnight in the fridge. Serve with slotted spoon. I reserved the remaining syrup for another use in the freezer.

    Butternut Squash & Kale Gratin (also adapted from Smitten Kitchen)

    For an oval gratin pan, 13″ long and 3″ deep
    1.25 lb thinly sliced butternut squash
    1.5 lb dino/lacinato kale and/or baby rainbow chard–I did 50% of each–clean & cut into small pieces
    1 small onion, diced
    pinch of nutmeg
    2 cloves garlic, minced
    2 cups heavy cream or whole milk
    4 T butter
    2 T flour
    1 T fresh flatleaf/Italian parsley, minced
    1 T fresh thyme, mined
    1 1/4 C gruyere cheese (about 5 oz)
    lots of salt & pepper

    Start by washing and spinning dry your greens. Dice the onion and begin cooking it at medium low heat in a large pan in 2 T butter. When soft, add any chard stems you are using and a pinch of nutmeg, salt, pepper. Cook another 1-2 minutes. Add greens and keep adding & stirring until all are wilted. Turn off heat and place mixture in a fine collander to remove excess moisture.

    Sauce: bring 2 C cream or milk to near boil with the garlic, being sure not to let it burn. Meanwhile, in a larger sauce pan, melt 2 T butter. When melted and water content is steamed off, add the flour and whisk, cooking 1-2 min more. Add the hot milk and whisk for 1-2 more minutes while bringing to a boil, turn off and leave it alone.

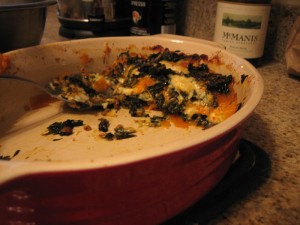
    Preheat oven to 400 degrees. Arrange 1/2 the butternut squash in your pan, evenly along the bottom. Add 1/4 the herbs, salt, pepper, and then top with 1/4 C of the cheese. Next, half the greens evenly on top. More salt & pepper, more herbs, more cheese. Pour 1/2 the sauce evenly over it at this point, and go back to the butternut squash slices. Add salt, pepper, then herbs, cheese. Add the rest of the greens, the herbs, salt & pepper. Top wit the rest of the sauce and then the rest of the cheese. Bake uncovered for the first 1/2 hour, throw foil on it for the 2nd half.

    As an aside, I want to reitorate how happy I am in my new space. Oh my gosh, look at that, I have a entry table! With a place to–no, really?–place flowers. Incredible.

  • Sundried Tomato Reduction Pizza + Butternut Squash Pizza with Sage & Fontina val d’Aosta

    Sundried Tomato Reduction Pizza + Butternut Squash Pizza with Sage & Fontina val d’Aosta

    Pizza with Sundried Tomato reduction

    Some of you know that I have stolen my go-to pizza dough recipe from Wolfgang Puck. Here it is for your convenience.

    1 pack dry yeast, with an expiration date we have not yet reached
    1 tsp honey or brown sugar
    1 cup warm water (about 105-115 degrees)
    3 cups all purpose flour
    1 tsp kosher salt
    1 T olive oil

    In a small bowl, dissolve the yeast in 1/4 cup of the warm water & the honey/sugar. Let it get a bit frothy while you gather your other ingredients.

    In a large bowl, whisk together the remaining dry ingredients. Create a well. Add the yeast mixture to the middle and the olive oil. Add the rest of the warm water, using it to get any yeast that stuck in the bowl. Mix together. It may be quite sticky. Add more flour and knead dough until smooth and supple.

    Cover with thin, damp towel (well wrung out) and put in a warm spot like on top of your gas range. Let it sit at least an hour but more if you can.

    Cut it into fourths. Grab a fourth and punch it down, gathering it back into a ball. Roll it out on a large floured surface with a rolling pin, until thin but not too thin to handle and put onto a well dusted cookie sheet without a lip or a piel, if you are fancy enough to own one. I was, but I gave it away several moves ago. So back to the cookie sheet.

    You’ll want to cook this on a pizza stone–if you’re going to bother making your own dough, you should get one. It makes a huge, huge difference in the texture and moisture of the pizza and how well it holds up to your toppings. It also is handy to leave in a stubborn or unpredictable oven because it will help regulate heat.

    Cook it as hot as your oven goes. Don’t over fill it. Too much = hard to handle & won’t cook right. Your pizza, when ready to cook, should NOT resemble any restaurants “veggie” pizza. Too much!

    Butternut Squash Pizza with Fontina Val D'Aosta & Thyme

    Butternut Squash Pizza
    Sautee cubes of fresh butternut sqash in butter or olive oil. Add salt & pepper. When tender, add some fresh or dried sage.
    Thinly coat pizza skin in olive oil, and add thin slices of red onion. Add cubes of fontina. Lastly, squash.


    Sundried Tomato Reduction Margarita Pizza
    My mom visited a while back and left us with a sundried tomato reduction which she had made to use in a risotto. Fancy. We put it on our pizza with some mozzarella and some thyme and it was deliciousss.

    My mom is pretty well known for reducing things, too. For example, demi glace. Or, port reduction for sauces on beef or pork. She’s been known to boil beef bones for days. We once had a golden retriever who would lay next to that pot for days. My mom taught her the words “reduction sauce.” She would react like you said “cookie” or “walk.”

  • nothing-in-the-fridge pasta (rigatoni in creamy tomato sauce with spinach)

    nothing-in-the-fridge pasta (rigatoni in creamy tomato sauce with spinach)

    I recently got a promotion and have been working a bit harder than the last year and a half that I enjoyed a bit of cruise control, so going to the grocery and planning meals, sadly, has been a lesser priority. I came home yesterday to a near empty refrigerator, telling myself my farm shipment would come today and refill it. It didn’t show, so we ate the same thing again tonight.

    For Two:

    150g rigatoni (about 2.5 cups dry)
    1/2 cup heavy cream
    1/2 cup chicken stock or other stock
    2 T tomato paste, good quality
    1 shallot
    1-2 T butter
    1/4 head garlic, minced
    fresh parsley, chopped fine
    1-2 cups fresh spinach

    Start your water to boil in a large pot with a lid. Meanwhile, peel the shallot and cut into quarters lengthwise. Slice 1/8 inch thick strips crosswise. Mince your garlic.

    Heat a nonstick pan with moderate sides to high, add the butter. When water evaporates from the butter, add the shallot and garlic, cooking for 30seconds. Reduce heat to medium and let cook until getting fragrant and colorful. Add the cream, and let cook together. Add the tomato paste and mix. When cream is reducing and mixture is thickened, add chicken stock 1/2 of it at a time. Feel free to adjust liquid ratios to your liking.

    As the pasta becomes al dente, bring the sauce to a higher heat and strain the pasta, immediately adding the spinach on top of it as it steams.  Put the pasta and spinach into the sauce pan and mix until spinach is wilted. Heat two pasta plates/bowls in the micro for 2 minutes and serve with parmasean on top!