Author: Caroline

  • Mussels & Clams Pastis

    Mussels & Clams Pastis

    mussels pastis

    BiRite Market opened up a location a short bike ride from my house, and I’ve made it an excuse to shop in smaller quantities and incorporate the exercise of going to the store as an excuse to make even fresher meals. These beautiful PEI mussels were filled to the edge of their shells with meat, the freshest I’ve seen in a long while and exceptionally tender.

    When shopping for shellfish, always make sure your shells are not broken (throw the mussel out if it is!), that they close when you agitate them, are free of debris on the outside (scrub them with cold water), and that you toss any that don’t open after cooking (though a small crack open is perfectly fine!).

    In case you have not cleaned or bought bivalves before, here’s what I do to clean them up and inspect them:

    How to Clean Mussels and Clams

    1) Bring them home immediately, and if you aren’t using them in the next hour, open up their bag and put them in the refrigerator so they can breathe, or set them on ice and leave them out, as they do in the store. Always buy them the same day you intend to cook them.

    2) 30 minutes to 1 hour before cooking, place them in very cold fresh water and leave them unagitated for at least 10 minutes. They will relax, open up, and use the fresh water, thus rinsing out any sediment, sand, etc from the inside of their shells.

    3) Before removing them from the water, inspect each mussel or clam for any missing chunks, major cracks, etc. If it has an imperfection, throw it out. If it does not close when you handle it, throw it out. Even when buying from a quality fishmonger, you’ll likely have 1-2 that get thrown out before cooking.

    4) Next, if especially dirty, replace the cleaning water and recover in very cold water. Remove any “beards” or seaweed looking bits that are hanging out the side of the mussels shells. Do this with a quick jerking action down towards the thickest side of the mussel. It will take a little effort, especially if they are very fresh. Strain them and cook them within 20 minutes or so!

    Mussels & Clams Pastis Recipe

    Serves 2

    1.5-2lb of mussels and clams
    2 T olive oil
    1 large shallot, chopped finely
    2 cloves garlic, minced
    1/2 C white wine
    1 C Pernod or other anise liquor
    2 T fresh parsley, roughly chopped
    salt & pepper

    In a large pan that will fit all of the mussels and clams, add the olive oil and heat to medium. Add the garlic and shallot, cooking until nearly translucent or beginning to be translucent, but not caramelized or browned. Add some salt, the white wine and pernod, and reduce slightly, raising heat immediately to high or medium high.

    Add the mussels and/or clams and cover, cooking about 2 minutes before checking. Cover again if they are not all or mostly opened. When all are opened, remove lid and stir well, adding fresh cracked pepper. Remove the mussels and clams and set aside in a warm spot or in a heated bowl (or place into heated individual serving bowls). Change heat to high and reduce liquid by 1/2, then add the parsley and serve over the mussels and clams.

    Serve with french fries or bread with butter.

  • Fava Bean & Blood Orange Salad with Ricotta Salata

    Fava Bean & Blood Orange Salad with Ricotta Salata

    Fava Bean & Blood Orange Salad with Ricotta Salata

    Spring is a time of transition–Fava beans, along with calcots, ramps & fiddleheads, are some of my favorite in-between spring crops. The hearty fava’s season is a bit longer, and they’re more available across climates and geographies than some of the others, and they pair well with a variety of other foods, and can be really enjoyed both hot and cold.

    Blood oranges have a late season this year, so I’m still enjoying them here in California. This is a really straight forward but delicious and loved dish, which serves 3-4 as a side.

    Fava Bean & Blood Orange Salad Recipe

    1-2lb fresh fava beans, whole
    1 medium blood orange, peeled with a knife
    1 tbsp (Spanish! buttery!) olive oil
    Ricotta salata (or bits of fresh goat cheese, farmer’s cheese, sheep’s feta or shaved pecorino romano)
    lots of salt & fresh cracked pepper

    Pop the beans out of their pods, and bring water to boil. Boil the beans for about 1 minute, until the color has brightened a bit. Strain, and dunk immediately into a cold water or ice water bath. Once cooled, strain again and begin peeling the beans out of their membrane. You can do this part ahead, stopping at any junction and resuming later. Cut the blood orange into diced chunks. Toss all the ingredients together, topping with shaved ricotta salata (which I clearly managed to get in the photo…) or other cheese as mentioned above.

  • Tocino de Cielo or Creme de Catalana

    Tocino de Cielo or Creme de Catalana

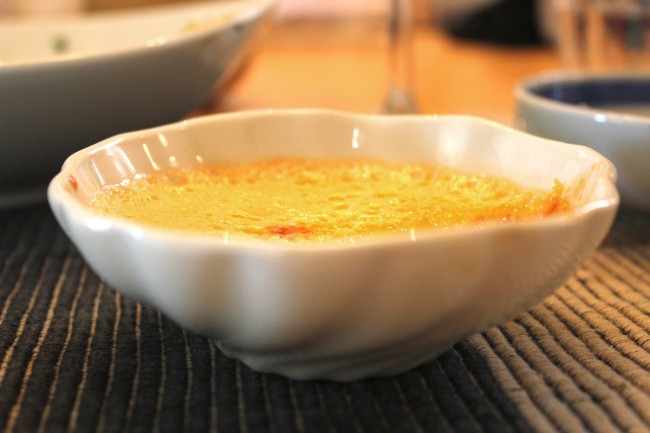
    creme de catalana or tocino de cielo

    I returned from a blissful, 11 day trip to Barcelona (with a two night detour to Budapest, of which I could write a hefty article about) where I ate and danced and lived like a Catalan princess, and skipped almost all the touristic activities that I’d be expected to partake, all in favor of getting a real feel for the city and surrounding towns. Being me, I researched a bit about Catalan food, and as I found myself in excess of 18 egg yolks one day, I sought out various versions of flan and creme brulee and…well, I stumbled on Tocino de Cielo, which, as far as I can tell, is very similar to Creme de Catalana, except it does not have the sugared, flame torched top similar to creme brulee. If you were to add it to this recipe, I believe you’d find yourself with Creme de Catalana.

    creme brulee containers white and blue from art & manufacture

    A pile of packages awaited me when I got back to San Francisco–among them these amazing creme brulee dishes I ordered from Edith at Art & Manufacture a few months back–telling her there was no hurry at all. I had almost forgotten they were coming and was delighted to unpack them. They made their way into a water bath the very next day, and I’ve used them for yogurt with rose jam and pistachios, Mato y mel and other dairy delights over the last week or so.

    tocino de cielo

    Tocino de Cielo / Creme de Catalana Recipe

    Makes five 5oz dishes

    Syrup
    1/2 C granulated sugar

    In a small pan, heat 1/2 cup sugar over medium-low heat and stirring regularly, until it comes to a medium amber color. It will clump and begin looking moist, and turn fairly quickly to syrup from there. Ensure no grains remain so that it will not crystalize. Remove from heat and divide immediately into one large dish that will hold 25 oz, or into five 6-8oz ramekins.

    Custard
    1/2 C granulated sugar
    1 C water
    one large strip orange peel
    one large strip lemon peel
    1 tsp vanilla extract
    6 large egg yolks
    hot water, for water bath

    In another small pan, combine sugar, water, and citrus peels. Bring to a boil. Using a thermometer, cook until sugar reaches 220F. Remove from heat and cool to room temperature. Remove zest strips and stir in vanilla extract.

    When syrup is mostly cool, preheat oven to 350F. In a large bowl, whisk yolks well until color lightens a bit. Whisk in cooled sugar syrup, then strain the mixture into something with a spout or that is easy to pour from. Divide the custard into the ramekins, on top of the cooled (and probably hardened) sugar syrup, leaving a bit of room at the top so you can move the container around easily.

    Place ramekins into a shallow baking dish, and place into the oven. Carefully pour hot/just boiled water into the baking pan, until about 2/3rds up the ramekins or container with the custard.

    If using small ramekins, less than 6 oz, bake for about 30 minutes. If using one large, shallow container, bake for 40-45 minutes. A sharp knife inserted gently into the center of one of the custards should come out clean, and they should jiggle only very slightly when moved. Do not overcook or they will crack when cooling.

    Carefully remove ramekins from water bath and allow to cool to room temperature– do not shock by putting directly into the refrigerator. The slow cooling allows the mixture to maintain a creamy texture. Cover with plastic wrap and refrigerate for at least 2 hours, until cold, before serving. If you used a smooth, easy container, you can invert when serving by moving a warm knife around the edges and inverting the container. I like to serve them as is.

  • Blanched Vegetable Salad with Lemon Ricotta and Shallot Vinaigrette

    Blanched Vegetable Salad with Lemon Ricotta and Shallot Vinaigrette

    Blanched Vegetable Salad Blanched Vegetable Salad with Shallot Vinaigrettewith Shallot Vinaigrette

    Blanched Vegetable Salad with Lemon-Ricotta and Shallot Vinaigrette Recipe

    Serves 4

    4 leaves butter leaf lettuce, washed
    1 watermelon radish, sliced thin with a mandolin
    1/2 C snap peas, trimmed and blanched in salted hot water for 30 seconds-1 min
    2 C broccoli and cauliflower in even, small pieces, blanched in salted hot water for 1 minute
    1/2 C ricotta cheese, fresh
    Zest of 1 lemon
    1 shallot, finely diced
    2 tsp djon mustard
    1 T olive oil
    2 T fresh lemon juice
    2 tsp fresh dill or tarragon, chopped finely (or 1/2 tsp dry and soaked in the lemon juice for a few minutes)
    salt & pepper to taste

    Set the ricotta out to room temperature. Whisk the olive oil, lemon juice, and mustard together, and add the fresh herbs and shallot, along with salt and fresh cracked pepper to taste. Leave to sit for 5-10 minutes (or store up to three days in refrigerator).

    Once you have prepared all of the vegetables (the snap peas, broccoli, and cauliflower not only need to be cut to an appropriate size, but also should be blanched for 30-60 seconds in salted, boiling water), assemble by placing lettuce at one end of plate, or off center on a round plate, and arranging the blanched vegetables from there.

    Use a spoon to drizzle dressing over the blanched vegetables, then mix the ricotta with a bit of salt and the lemon zest. Top the salad with a quenelle of ricotta, and a few slices of watermelon radish.

  • Rack of Lamb with Winter Vegetables

    Rack of Lamb with Winter Vegetables

    Warm Winter Vegetable Salad

    Winter Rack of Lamb Medium Rare

    The lamb I made according to my Weeknight Rack of Lamb Recipe–hands down the easiest, tastiest rack of lamb recipe you’ll come across. The special part of this that will make you feel extra good after eating is all the delicious vegetables. I took a smorgasboard of what I had in the refrigerator–you can do the same–and cut, washed, and blanched (cooked in salted, boiling water for a few brief minutes) all of it. I then dressed it while still warm with excellent, buttery Spanish olive oil, salt, pepper, and lemon zest.  Get creative!

    Warm Winter Vegetable Salad Recipe

    Serves 4
    1 sweet potato, cubed
    1/2 head romanesco or cauliflower (or 1/4 head of each), cut into small pieces
    1.5 C sugar snap peas, trimmed and cut in half
    2T kosher salt (for boiling water)
    zest of 1 lemon
    1T olive oil

    Bring a pot of water to boil and add 2T kosher salt. Add the sweet potato, cooking for 90 seconds. Add the cauliflower/romanesco, and cook for 60 seconds more. Add the snap peas, and cook an additional 30 seconds. Drain all well, and serve with olive oil and lemon zest on top.

  • Thanksgiving: Cooking Live Crab with Fennel and Celery Salad

    Thanksgiving: Cooking Live Crab with Fennel and Celery Salad

    Stack of Steamed Fresh Live Crabs

    We had planned to visit Captain Barry’s Fresh to pick up some crab on Thanksgiving morning as a project and tasty dinner, but also to have a bit of Thanksgiving fare with the crew; there had been an accident the night before and while Thanksgiving was cancelled, we hope all will be well soon. They were still selling crab this morning, so we decided it would be a great, light departure from the gut-stuffing realities of turkey day. We loaded up the dog and headed down to the dock.

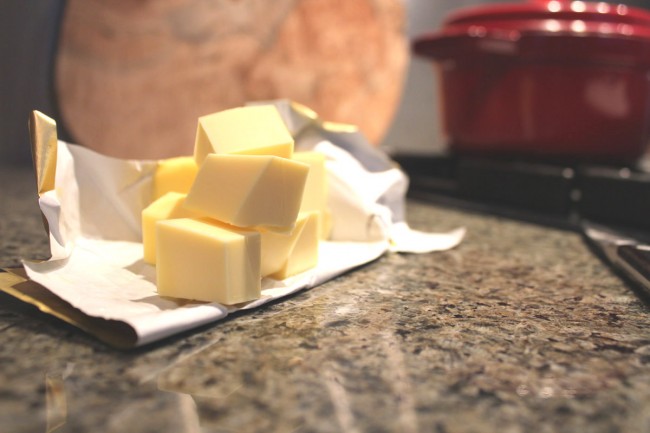
    butter cubes

    Red Dutch Cast Iron Enamel Sautee Pan with Melting Butter

    We brought home three lively critters, about 2 lbs each, and got our pots boiling. Being a total sissy, I didn’t want to kill and clean them raw, so we dunked them right into the boiling water for 15 minutes each (since they were so large). Afterwards, I cleaned them using this method, and stacked them up on our table with some melted butter, a fresh fennel-celery salad, and a bottle of champagne.

    Fennel and Celery Salad

    Fresh Fennel and Celery Salad Recipe

    Serves 2-4

    1 small or 1/2 large head fennel, sliced thinly on a mandolin
    2-3 stalks celery, sliced thinly on a mandolin
    juice of 1/2 lemon
    2 tsp olive oil
    salt & pepper

    Mix all ingredients together and serve. This holds up very well over night, but is best dressed freshly for maximum crunch.


    Stack of Fresh Cleaned Dungeness Crab Legs

    How to Cook Live Crab

    Prepare large pots of boiling water; when boiling, add the live crab. Cover most of the way and cook for 15 minutes. Remove the crab and let it cool a bit, then use this crab cleaning method to prepare for the table. Serve with drawn butter; use a cast iron based pan (in my case, a vintage dutch enameled pan) to keep the butter warm for longer, tableside.

  • A Whole Roasted Trout Recipe

    A Whole Roasted Trout Recipe


    Whole Roasted Trout from McFarland Farms

    A few weeks ago, Peter served up a delicious, and, to my shock, farmed whole trout. He stuffed it with prosciutto and vegetables, preceded it with a baby beet salad with seasoned ricotta, and a great meal was had by all. This afternoon I braved the Thanksgiving crowds and visited Bi-Rite to get myself a trout and try it out myself.

    McFarland Farms Whole Roasted Trout Meat

    Whole Roasted Trout Stuffed with Prosciutto & Fennel Recipe

    Serves 3-4

    1 whole trout, 1.5-2 lbs (this is a rainbow trout)
    4 pieces freshly sliced prosciutto di parma
    1/2 head fennel, sliced thinly and sauteed until nearly caramelized in butter
    zest of 1/2 lemon
    salt

    Ensure the trout is gutted fully and clean; season with salt inside and line the cavity with the prosciutto slices. Toss the cooked fennel with the lemon zest; between the sides of flesh, stuff the fennel into the fish. If you have twine or something edible to tie the fish together, do so now. Roast at 400 degrees for 15-25 minutes depending on the weight of your fish, on a foil lined pan, without cover.

    When serving, gently remove the skin from the top half of the fish and push the meat off the bones. When the spine is exposed, lift it up or turn the fish over to remove the rest of the meat. Remove the prosciutto sack and cut it into slices to serve along the fish.

  • Thanksgiving Floral Arrangement

    Thanksgiving Floral Arrangement

    thanksgiving floral arrangement

    thanksgiving floral arrangement

    Stopped by Bi-Rite Market and selected a few stems to make a tall bouquet for the mantle. I already had the rocks and vase, so this more than 30 inch high arrangement cost $18, and I suspect it will last at least a week.


  • A Muse: Ottolenghi’s Jerusalem

    A Muse: Ottolenghi’s Jerusalem

    I’m in love with this cookbook. Jerusalem – Ottolenghi’s latest is super sensory pleasing. Since I’m off nightshades and grains–probably permanently, middle eastern cuisine has been a great fit. Clearly, this change in my diet is why you’re off a lot of my recipes–there’s been a marked lull in my post frequency, and it’s because I’m cooking more for necessity and nourishment, and I’m slowly marrying that with decadence, deliciousness and beauty. It’s a time of testing recipes and I hope to deliver many new, healthy, wonderful ones to you soon.

    In the meantime, please enjoy Jerusalem. It’s an incredible cookbook, delicious, approachable, and healthy.

  • Shrimp Stuffed Poblano Peppers with Tomato Red Pepper Sauce

    Shrimp Stuffed Poblano Peppers with Tomato Red Pepper Sauce

    A new favorite, this shrimp stuffed poblano peppers recipe can be prepared ahead and cooked on a weeknight, it’s healthy and chock-full of vegetables and lean protein. I clearly was lazy in peeling my peppers, but we didn’t mind a bit of charred skin here and there.

    [buymeapie-recipe id=’2′]Shrimp Stuffed Poblano Peppers with Tomato-Red Pepper Sauce Recipe
    Serves two for main course

    The Peppers & Filling
    4 poblano peppers, charred over a flame and peeled or cooked at 400 degrees for 15 minutes and peeled
    3/4 lb shrimp, peeled and chopped roughly
    2 cloves garlic, minced finely or mashed
    2 T fresh cilantro and/or basil, chopped
    1/4 red bell pepper, chopped finely
    1/2 tsp ground cumin
    3/4 tsp sea salt

    Combine all but the peppers in a bowl, and stuff the peppers with the mixture, closing them again as best you can. Bake in oven at 350 for 8-11 minutes, depending on size of the peppers. Shrimp will be completely white and pink when done.

    For the Tomato-Red Pepper Sauce
    1 large red bell pepper, roasted at 400 degrees, peeled, seeds removed and tossed into a blender
    2 ripe, never refrigerated roma tomatoes or one small can peeled roma tomatoes or chopped tomatoes
    2 cloves garlic, chopped
    1 tsp chili flakes or equivilent
    4 small-medium shallots, chopped finely
    2 tsp coconut oil or other cooking oil

    In a sauce pan, warm the coconut oil and add the shallots and chili flakes, cooking until shallots begin to go limp. Add the garlic and chili flakes, followed immediately by the tomatoes–slice thinly the tomatoes and add to the pan, cooking at medium heat until they are falling apart, about 20 minutes. Add it all to the blender with the roasted pepper and puree. It will likely be thicker than soup; you can thin it with vegetable or chicken stock, or serve it thick under the cooked peppers.