Category: lunch

  • Pan Seared Halibut on Asparagus Potato Hash

    Pan Seared Halibut on Asparagus Potato Hash

    pan seared halibut on asparagus potato hash

    pan seared halibut

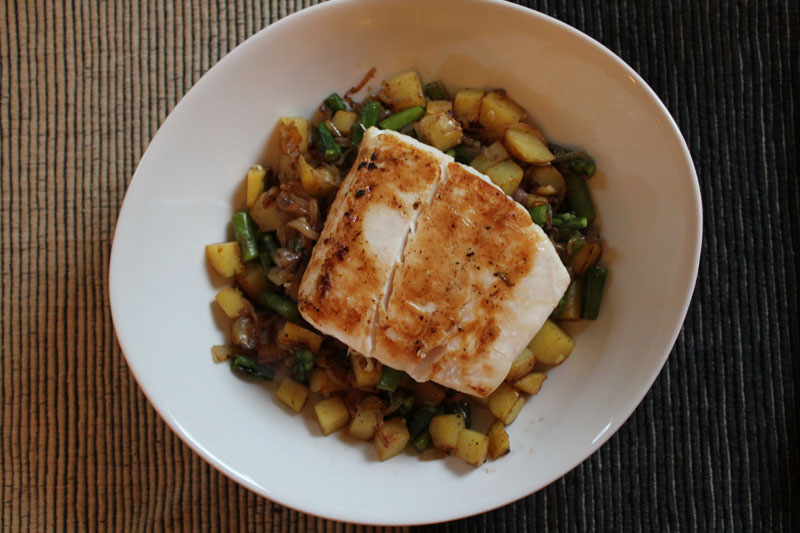
    Pacific halibut, local asparagus, capay potatoes and leeks.

    Recipe: Pan Seared Halibut on Asparagus Potato Hash
    For One
    1/3 lb halibut filet, skinned
    8 spears asparagus, chopped in 1/2 inch segments
    1 leek, sliced finely
    1 small spring onion, diced, tender tops chopped and set aside
    2-4 T dry white wine
    3 T cooked farro or other grain (rice, etc– can omit as well)
    avocado oil or other mild oil

    In a 8 or 9 ” cast iron skillet (or other pan), heat 1-2 tsp oil at medium heat. Add the onion and leek, cooking until tired looking. Add the asparagus and cook 2-3 minutes until deeper green. Add white wine and cover loosely with a lid, steaming through. When asparagus is tender, remove lid and add farro and onion tops, cooking until hot. Place mixture into your serving bowl or plate.

    Bringing same pan to high heat, add a little more oil and fry the halibut on one side until golden. Flip, reduce heat to medium low, cover loosely with a lid and continue cooking a few more minutes until texture firms evenly and fish is cooked, about 3-5 minutes depending on filet thickness. Place on top of farro hash mixture and enjoy.

  • Red Snapper En Papilotte + Endive, Apple & Red Cabbage Slaw

    Red Snapper En Papilotte + Endive, Apple & Red Cabbage Slaw

    [donotprint]red snapper en papillote with lime & thyme[/donotprint]

    Red Snapper Filets en Papilotte

    1/3 lb snapper filets, as many as needed (1 per person)*
    lime, sliced thinly
    thyme sprigs
    parchment paper
    *great* olive oil (optional)
    salt & pepper

    Begin by patting dry and lightly salting the filets. On a piece of parchment wider than the fish is long and twice as long as the fish is long, place the filet. Layer a few slices of thin lime on the fish, topping with some thyme sprigs and a dash of olive oil if you like. Top with pepper.

    Fold the parchment in half, with the filet sitting flat against the crease of the paper. Fold the corners in, folding down several more times. Fold in the other sides and tuck under to create an enclosure (the fish will steam). Repeat on remaining fish.

    Bake on a sheet (in case of leaking juices) for about 15 minutes at 350-400 degrees. Fish will flake away easily when done.

    *This recipe will work for any fish en papilotte; you may need to adjust cooking time for thicker fish and I think the method lends best to more delicate fish (ie, not salmon)
    [donotprint]
    red cabbage slaw with apples, endive, carrot, lime & red onion[/donotprint]

    Endive, Apple, Red Cabbage Slaw

    serves four

    1/2 small red cabbage, sliced very thinly
    1/2 medium red onion, sliced very thinly
    1 large carrot, shredded
    1/2 or whole apple of choice, cubed
    2 endives, sliced in 1/4 or 1/8 inch short strips (can use radicchio, etc)
    juice of 1 lime
    1 tsp walnut oil (or other mild oil)
    1/2-1tsp ground cumin
    salt

    Using a mandolin (ideally), slice the onion and cabbage. Slice the endives (or radicchio or other chicories), chop the apple and shred the carrot. Whisk the lime juice, cumin, oil and salt to taste. Mix everything together. Keeps well for 1-2 days, but best fresh.

  • Heirloom Beans with Spinach & Pork Belly

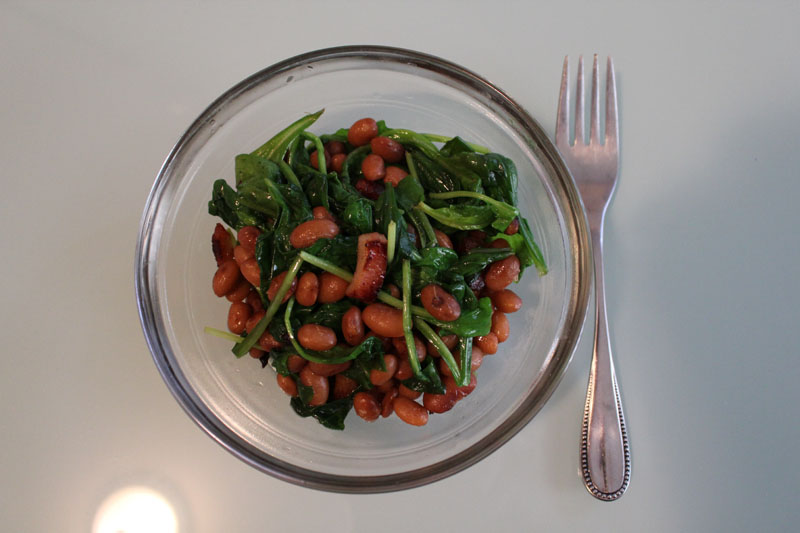
    Heirloom Beans with Spinach & Pork Belly

    [donotprint]

    An easy weeknight meal, greens and beans make a healthy, nicely balanced snack or meal. You can always add more meat or greens to suit your taste & dietary needs.[/donotprint]

    Vallarta Beans from Rancho Gordo (or other small-medium size firm bean)

    2 Cups spinach per serving

    1 inch cube smoked pancetta per serving, diced (can use regular pancetta too)

    Prep the beans by soaking for 6-8 hours in room temperature water. Strain and put the beans in a large pot, cover with 3 inches of water and simmer for 1-2 hours; do not boil, do not let the pot run dry. Strain and you can reserve for up to a week in the refrigerator.  Use 1/2 cup cooked beans per serving.

    Fry the pancetta in a medium hot pan; when beginning to brown add the beans and cook until hot. Add the spinach and cook until wilted; serve.

  • Age Dashi Tofu with Tempura Dipping Sauce

    Age Dashi Tofu with Tempura Dipping Sauce

    [donotprint]recipe photo: home made age dashi tofu

    I’ve mentioned this before–when you start cooking Japanese food at home, it makes sense to just keep doing it. The ingredients effectively make you stock an entirely new kitchen, and while each step of most dishes is very simple, they almost always require making ingredients to be used–layer upon layer. So you may as well make extra stock, extra sauce, and repurpose it later in the week.

    On that note, I have found several new Japanese cookbooks that I adore. I’ve mentioned the fabulous Washoku before, but the new ones I am in love with are more like encyclopedias of Japanese cooking, with huge selections of traditional hot dishes, allowing you to perhaps recreate something you’ve eaten in a quality Japanese restaurant. Japanese Cooking: a Simple Art &  perhaps now my all-time favorite, The Japanese Kitchen–it lacks photos, but provides great instruction and is excellent for those of us who know roughly what we want to make.


    [/donotprint]
    Age Dashi Tofu (Fried tofu with broth sauce)
    1 10-oz block tofu; you can use firm sprouted tofu for full flavor or silken tofu for a nice play on soft-vs-crunchy
    1/2 C potato starch (can sub corn starch if you must)
    A lot of frying oil such as sunflower or safflower oil
    2 green onions, sliced thinly on the diagonal

    Drain the tofu well and pat dry, using some firm pressure but not breaking the tofu. If using firm or extra firm tofu, wrap in paper towels and place heavy dinner plate on top, letting sit 30 minutes. Next, slice along each axis of the block and then several times more to end up with 8 even rectangles. Dredge the rectangles in potato starch , tap excess off and let sit 5 minutes while your oil heats. Fry the blocks until slightly golden, about 5 minutes and then drain on a rack or paper towels. Serve half covered in sauce with green onion on top, and the tempura sauce’s ginger or daikon.

    Tempura Dipping Sauce
    1 C dashi (kelp/tuna flake stock)
    5 T soy sauce
    3 T mirin
    1 T sugar
    1/2 C katsuo bushi (tuna flakes)
    2 tsp grated ginger or daikon, served with the sauce

    Combine all ingredients except ginger/daikon, and bring to a boil. Add the katsuo bushi and turn off the heat. Let stand 2 minutes, strain and reserve. Lasts up to 1 week in refrigerator. Serve Warm.

  • “Moon Viewing Noodles” – Udon with Pork & Sweet Potatoes

    “Moon Viewing Noodles” – Udon with Pork & Sweet Potatoes

    [donotprint]udon noodles with pork tenderloin and sweet potatoes "moon viewing noodles"

    The hiatus was not entirely my fault. We had an issue with the kitchen sink’s piping, which, once we went in to fix what seemed simple, turned into quite a mess of replacing one part after another, the crescendo being when the disposal decided to actually fall out.

    I was not very motivated to create more messes with no great way to clean them, and shortly after that was fixed the hot water decided to turn a lovely rusty brown. Anyway, we are all back in action and, I’m happy to say, fully functional again!

    About this time last year I began cooking lots of Japanese food, mainly from a great cook book I own called Washoku Kitchen ($24.50 at the time of this post)– “recipes for Japanese home cooking.” I picked it back up yesterday and started cooking, with a few modifications.

    The thing about good Japanese cooking is that the most delicious items seem to take many steps–5 ingredients, but each one you must create. A soy concentrate. A dashi. A miso mixture. It takes time, and works best if you start cooking a LOT of Japanese food, so you can make these things and use them more than once without duplicating efforts.

    [/donotprint]

    Udon noodles with pork & sweet potatoes/yams

    For 3-4 people as a main course
    12 oz fresh udon noodles, cooked*
    8 cups dashi with shitake**
    4 T seasoned soy concentrate***
    1/2 large sweet potato, peeled & cubed
    1/2 lb pork tenderloin, sliced thinly
    2 green onions, sliced thinly on the diagonal

    Bring the dashi to a light simmer, adding the soy concentrate. Place the cooked udon noodles in heated bowls. Using a large skillet and a lightly flavored oil such as avocado, cook the sweet potato on medium high heat until color is deepened, adding a touch of salt.

    Add 1 T sake and 2 T water, and cover to steam 3-4 minutes. Push potatoes to side of pan and add pork, trying not to pile the pieces on top of each other. When pork is cooked, pour broth over noodles, add potatoes & pork to one side of bowl and sprinkle green onion over the top.

    *cooked in a wide, not too deep pot with plenty of water for 2 minutes boiling, then drained and rinsed in cool water

    **combine cold water with strip of kombu (thick kelp) and two dried shitake mushrooms. After 10 minutes, bring to just under a boil and then turn off. Add 1 cup unpacked bonito flakes (large tuna flakes). Let steep 2 minutes, then strain and return to clean pot

    ***Combine 2/3 cup soy, 1/3 cup sake, 1 dried shitake mushroom & 1/4 cup bonito or other tuna flakes, let steep 1hour-12 hours. Add 2T mirin, 3T water, 3T sugar. Bring to a simmer and reduce by 1/4. Strain and reserve.
  • White Lasagna with Kale, Sausage, & Sweet Potatoes

    White Lasagna with Kale, Sausage, & Sweet Potatoes

    white lasagne with sausage, kale, sweet potatoes & leeks

    For the lasagna assembly:
    1 pack no-boil lasagna sheets (GASP, a shortcut!)
    2 small sweet potatoes, peeled and sliced thinly
    2 lbs kale (mixed is OK), blanched, drained, and chopped finely
    1 lb sweet italian sausage, no casing, pan fried and set aside
    2 large leeks sliced thinly and cooked at medium low heat in fat from sausage

    Bechamel sauce for white lasagna

    8T butter
    1/2 C flour
    1/2 tsp nutmeg
    1/2 tsp garlic powder or 1 clove fresh garlic
    3 3/4 C milk
    1 C chicken or vegetable stock
    2 eggs, beaten
    1/2 C marsala
    1 C mixed grated cheese such as parmesan, pecorino, fontina, gruyere
    salt & pepper

    Melt the butter. Once it reduces spitting/bubbling, add flour and whisk, cooking for 3 minutes at medium heat. Slowly add the milk and the stock, raising heat to high. Bring to a boil, stirring constantly, until sauce coats the back of a spoon. Set aside to cool until warm to touch.

    Once warm to touch, add the beaten eggs, 1/2 C marsala, 1/2 C of cheese and salt & pepper to taste.

    Assemble the lasagna

    Preheat oven to 375. Pour a thin layer of bechamel sauce on the bottom of your lasagna pan (preferably 8×10 or something similar/bigger), add two layers of lasagne sheets. Spread the sausage evenly, add salt & pepper, and cover with more sauce.

    Add another 2 layers of lasagna sheets, next adding the kale. Top with salt & pepper, sauce, and more lasagna sheets.

    Add a thin layer of leeks, and then as if making a gratin spread the sweet potato slices in a single overlapping layer.

    Add more salt & pepper, sauce, and the final layer of lasagna sheets. Top with sauce and remaining cheese.  Bake for 40 minutes to 1 hour.

  • St. Louis Style Cannelloni with Pork, Ricotta, & Chard

    St. Louis Style Cannelloni with Pork, Ricotta, & Chard

    cannelloni with ricotta, chard, and sausage

    This recipe will feed about 4 people with a side dish or 3 hungry people without one. It helps to have a food processor available.

    Filling
    2/3 lb spicy or sweet Italian pork sausage, out of casing
    3 cups chopped chard and/or spinach
    1 cup ricotta cheese (preferably sheep’s ricotta)
    1/2 yellow or white onion, diced

    Cook the sausage in a medium high heat skillet in a little chunks, seperating with your fingers, until brown on one side. Add the onions, and cook until mostly tender. Add the chard/spinich, and cook briefly until wilted. Allow mixture to cool slightly in pan or in thin metal bowl, and if you have one, use a food processor to make the mixture more even/fine. Once cooled to room temperature or close to it, add the ricotta and stir until blended. Adjust seasoning.

    Red Sauce
    1 container chopped or strained tomatoes (I used a carton of POMI)
    1 stick butter
    1/2 onion, peeled and intact

    Combine all ingredients in sauce pan and simmer until delicious. Add salt. About 30 minutes. Can make ahead.

    White Sauce
    1 T butter
    2 T flour
    1-2 cups milk
    salt & pepper
    1/2 tsp thyme or 2 tsp fresh thyme chopped

    Melt the butter until the water content has fizzled off, add the flour and whisk, cooking about 1 min until slightly darker. Slowly add milk until you have a nice, somewhat thick consistency sauce. Set aside. You’ll be reheating this shortly and possibly adding more milk to pour over the cannelloni.

    Pasta
    2 eggs
    00 white wheat flour if possible
    0 semola / semolina flour

    Use this recipe and roll out as thin as possible into sheets, cutting into strips about 10 inches long by 4 inches wide, roughly. It is ok if the sheets vary in size, so long as they’ll roll into a cannelloni giving it a few layers around. Boil water, add salt, and one at a time blanch the strips for 30 seconds or so, until they toughen up a bit. Remove, set on paper towels flat, not touching other pasta, in layers, to reserve for use.

    Alternatively you can buy cannelloni tubes from the grocery or lasagna sheets without the ruffles.

    Assembly

    Put a thin layer of red sauce in your baking/casserole dish to prevent pasta from sticking to bottom. Roll several spoonfuls of filling into each pasta sheet, placing each closely against the next in the dish. Once finished, top with red sauce thoroughly, then white sauce. Top with grated parmesan or asiago, bake at 375 for 25 minutes until golden and beautiful on top.

  • Gorgonzola and Pear Gnocchi (Gnocchi alla Gorgonzola e Pera)

    Gorgonzola and Pear Gnocchi (Gnocchi alla Gorgonzola e Pera)

    Gnocci with Gorgonzola and Pears

    Gnocchi alla gorgonzola e pera is actually a pretty common dish in the northern half of Italy; the kind of thing any restaurant that might be serving tourists would throw on (without regard to seasonality, local cuisine, etc), and while that might turn you off, it’s actually quite good. That said, I ate it several places in Florence, and am fairly certain I spotted it on other menus around the way.

    I couldn’t find much on the history of this dish, so I think it’s more of a modern classic–prior to not-too-many-years-ago, most classic products of regions didn’t get transported or heavily used much in other regions. There was a time when gorgonzola is what you ate when you were in piedmonte; risotto is what you ate in Milan and in the far north, you ate potatoes in Alto Adige and maybe in Emilia-Romagna. Less so now, with the best of the best being desired by Italians everywhere loving food.

    Gnocchi is, however, typical of Alto Adige (where potatoes are most common), and gorgonzola–if it is officially DOP gorgonzola–is from Piedmonte. For this dish, you’ll want to use the opposite of what you’d likely want to snack on in a cheese plate. You’ll use Gorgonzola Dolce, which is the young, “sweet” gorgonzola. As the cheese ages it becomes more “piquante” or spicy, hot. It’ll tickle your throat if it’s the wrong type for this job. If you don’t have a quality cheese chop that carries both and can point them out, look for gorgonzola (imported, not pre-crumbled) that has a more soft, creamy texture with less blue bits–that’s usually it.

    For 3-4
    3 oz gorgonzola dolce cheeese
    1 ripe pear, diced
    1 T butter
    2 T flour
    1 cup light vegetable stock
    1/2 cup milk
    fresh gnocchi*
    salt, fresh ground pepper

    Boil your water and have it ready. If you are using fresh gnocchi (which you could be!), they require VERY little cooking time, take what you think they take and cut it by half. Seconds! Otherwise, they’ll fall apart, and you’ll regret it.

    Dice your pear, have your ingredients ready. You may or may not need slightly more or less veg stock & milk. Create a roux by heating the butter in a small sauce pan, until clear and stopped bubbling, medium heat. Add the flour and whisk until color darkens slightly, about 2 minutes. Continue whisking and slowly add the vegetable stock, then the milk, until you get a mac-n-cheese type consistency, or slightly thinner. Add the gorgonzola and continue whisking until smooth.

    Add the gnocchi to the water and cook; remove the gnocchi as soon as they float to the top of the pan using a slatted spoon or gnocchi paddle. Add the pear to the sauce and let it warm up, adding the gnocchi to the sauce and stirring gently to coat, with a large wooden spoon (don’t use metal, you’ll chop up the dumplings).

    Add some salt and black pepper to taste, serve!

    Fresh gnocchi makes a huge difference over the vaccu-packed kind you’ll find on the pasta isle. It’s much less dense and has the texture of a down pillow, collapsing in your mouth. I buy mine in bulk from Rainbow market or from Faletti Foods; both carry gnocchi by the bay area’s “Pasta Shop,” which lots of local stores retail products from.

  • Salmon Cream Cheese Wontons & Spicy Persimmon Slaw

    Salmon Cream Cheese Wontons & Spicy Persimmon Slaw

    home made salmon cream cheese wontons

    spicy persimmon cabbage salad

    Inspired by Wild Ginger in Cambria, CA, these wontons are tasty, filling finger food; the slaw helps to cut the fat and is a nice fall accompaniment. They’re also a really convenient way to use up any leftover wonton skins and leftover salmon.

    For 12-16 wontons

    Square wonton skins
    1/3 lb salmon, cooked (grilled, broiled, whatever)
    1/4 C cream cheese (I prefer Gina Marie from Sierra Nevada Cheese Co)
    1-2 tsp brown rice vinegar
    1/8 tsp five spice powder
    salt
    lots of safflower/sunflower/other high eat oil for frying

    Shred the salmon and mix with room temperature cream cheese. Add rice vinegar, five spice powder, and a pinch of salt to taste. Set aside for up to 2 hours or refrigerate up to 2 days ahead. Use 1T per wonton wrapper and moisten wrapper with spray bottle. Fold diagonally and seal, then bring end points together and seal. Fry at medium high heat, testing a piece of wonton skin first, until evenly golden.

    Spicy Persimmon Cabbage Slaw

    1/2 head cabbage, chopped somewhat finely
    1 persimmon, sliced thinly
    2 tsp gochujang or other chili paste such as harissa
    juice of 1 lime
    1/4 tsp ground cumin
    salt

    Whisk gochujang, lime juice, cumin and salt; toss cabbage and persimmon in mixture and let set 10 minutes before serving, or up to 1 hour.

  • Rancho Gordo Heirloom Bean Chili

    Rancho Gordo Heirloom Bean Chili

    home made chili with rancho gordo heirloom beans

    Delicious chili made from Rancho Gordo heirloom organic beans, adapted from Smitten Kitchen.

    olive oil
    2 large yellow or sweet onions, diced
    1 T minced garlic
    2 large carrots, cubed
    1 cup dry pinquito beans
    1 cup dry yellow-eye steuben heirloom beans (also rancho gordo but they aren’t selling them online! if you’re in SF try Rainbow’s bulk section)
    3 lbs ground beef, turkey, chicken, or pork (I used mostly beef/pork, but a little ground chicken too)
    1 green bell pepper
    1 red bell pepper
    4 T chili powder
    1 T cumin (ground)
    2 T paprika
    1 T dry oregano
    1 T chili flakes
    16 oz tomatoes chopped or stewed/pureed (I use POMI)
    2 C beef broth or veal stock
    1/4 C cider vinegar

    Garnish:
    Cheddar cheese, grated
    Red onion, diced

    Serve with macaroni  OR bread

    Beans: Soak the beans overnight in plenty of water. Do not soak more than 9 hours or they will probably burst. They may be mixed for soaking. Try to pre-cook ahead, but if not, start cooking the drained, rinsed, soaked beans in fresh water in a seperate pan as you begin making the chili. Cover and be sure they are cooking at at least a simmer, but not a boil. You want them tender before you add them to the chili at the end. They like to be cooked about an inch of water over the beans; just drain off the extra water if they’re cooked through.

    Chili: In a soup pot or dutch oven, heat a couple tablespoons of olive oil or butter. When hot, add diced onions. Cook until almost translucent, at medium heat. Add the garlic & carrots, cooking another 2-3 minutes. Add the meat, and let it cook through.

    While meat is cooking, dice your peppers and gather your other ingredients.

    When meat is cooked, add all of the spices. Cook 2-3 minutes. Add the tomatoes, beef stock, and vinegar. You may wish to reserve additional beef stock in case you prefer looser chili. Prepare your garnishes. Add the drained, cooked beans to the chili and you may serve in 10 minutes (simmering) or any amount of time after. The longer it sits, the better; I like to put the lid back on the pan and let it cool down very slowly, so that the flavors meld.

    Serve with cheddar and red onion on top.