Category: Recipes

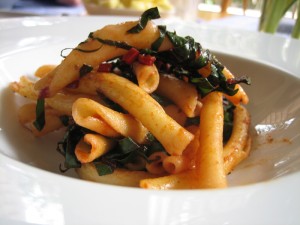
  • Rigatoni with Tomato Cream Sauce, Peas, Chard (Pasta with Spring Vegetables)

    Rigatoni with Tomato Cream Sauce, Peas, Chard (Pasta with Spring Vegetables)

    Pasta with spring vegetables - Rigatoni with fresh english peas, chard, and tomato cream sauce  weeknight pasta

    Feel free to improvise the dairy combo in this; I used what I had on hand–full cream or whole milk would suffice, or you can combine skim and sour cream, whatever you have around. Ultimately this is pasta with spring vegetables, and you can substitute where it makes sense to.

    For two

    150 grams rigatoni
    1 cup milk
    2 T creme fraiche
    1/2 tsp Italian dried herbs (basil, oregano, thyme, any combo thereof)
    2-3 T tomato paste
    1/2 cup peas, shelled
    1 1/2 cups cleaned, chopped chard or kale

    As you start the pasta is cooking (bring water to boil first before starting the sauce), use a large skillet to gently warm the milk and tomato paste. Add some salt.

    When steaming or very lightly simmering, stir mixture and add herbs and peas. Continue cooking a few more minutes.

    When pasta is done,  drain and add to the sauce pan, adding the chard and creme fraiche, covering, and letting wilt. A little parm or pecorino on top is nice.

  • Fried Chicken on Fresh Corn, English Peas, and Kale; Plum Ice Cream

    Fried Chicken on Fresh Corn, English Peas, and Kale; Plum Ice Cream


    Fried Chicken Nuggets on Kale and Fresh Corn

    Fresh Plum Ice Cream

    Yesterday we had some new friends over for dinner, and I planned the menu while starving after my morning yoga class. I resurrected the tomato soup (tomato soup recipe) I always make (but haven’t for about a year), took a hint from a restaurant we went to recently and constructed a fried-chicken breast nuggets dish on fresh corn, English peas, and kale. I already had the peas and corn from my farm shipment and wanted to make sure they didn’t go to waste.

    Fried Chicken Breast Nuggets on Kale, Fresh Corn, and Fresh English Peas

    3 boneless/skinless chicken breasts
    1 1/2 bunches kale
    4 ears corn
    1/2 lb fresh English peas in pods
    Sunflower, avocado, or peanut oil enough to fry in a large, high sided skillet, about 2 cups or more
    2 T butter

    For Chicken Coating:
    1 C flour, set aside

    For Chicken Batter:
    1 tsp paprika
    1 tsp baking soda
    1 tsp baking powder
    2 egg whites (can use whole eggs if you prefer)
    1/2 cup milk

    Frying the chicken:
    Cut the breasts into a few different sized chunks in order for the chicken to cook evenly by being fried. None are larger than 1.5 inches thick, 2 inches long, 2 inches wide.

    Heat oil at least 1 inch deep in a large high sided skillet; do not fill the skillet more than half way. It should be about 375 degrees; if you don’t have a thermometer (I don’t), test it with a bit of batter.

    Generously salt & pepper two sides of the chicken pieces, and coat in flour. Dip into the egg mixture/batter, then back in the flour, placing within a few minutes into the hot oil.

    I fried the chicken in 3 batches in a 10 inch skillet to not over crowd.

    Chicken will become golden and firm when poked, flip it only once and remove and place on a rack or paper towels to drain. If desired, sprinkle with sea/kosher salt at this point.

    The vegetables:
    Ahead of time, wash and cut your kale–remove the thick stem, cut into 1 inch pieces. Boil some water, add salt when boiling and blanch the kale for a few minutes until deep green and tender. Drain and set aside.

    Wash the corn and cut it off the cob, remove the peas from their shells.

    While the oil for the chicken is heating, heat the butter in a skillet. When hot, add the corn and some salt, and continue stirring or flipping until 1/3 is golden/gaining color. Add the fresh peas and cook a few more minutes as the chicken finishes its last batch of frying.

    Assemble by placing the hot corn mixture on the plate or bowl, adding the kale and topping with the fried chicken.

    Plum Ice Cream:

    A friend and coworker gave me some delicious, overly ripe plums last Wednesday, so I made plum preserves of the immediately with very little sugar so they retained their color and tartness; I left them in as large of chunks as was possible and canned up two small jars. They came into play when I decided to make a delicious, custard-y vanilla ice cream and swirl them in.

    Adapted from David Lebovitz

    3/4 Cup milk
    1/2 Cup granulated sugar
    2 T brown sugar
    pinch salt
    3 egg yolks
    1 1/2 cups heavy cream
    1/2 plump, full size vanilla bean
    1/3 cup plum preserves

    Heat the milk, salt, and sugars in a saucepan over low heat until sugars combine and milk is beginning to look granulated/clear. While milk is warming, scrape the vanilla bean seeds out of the pod and add it to the milk, and add the pod itself too.

    Whisk lightly the egg yolks in a bowl and gradually add warm milk to temper/warm the egg yolks. Once warmed, pour the egg yolks into the sauce pan with the milk and stir well as you do so to prevent coddling.

    Cook over low heat, stirring constantly and scraping the bottom with a spatula until custard is thick enough to coat the spatula. Strain the mixture into the cold heavy cream, wrinsing the vanilla bean pod and adding it back in again. Chill thoroughly and then follow your ice cream maker’s instructions, adding the preserves when the ice cream is fairly thickened, almost done.

    Fresh Plum Preserves

    Plum preserves recipe: Wash, then cut plums into halves or quarters if they are still very firm, place in a pot, cover with about 1/8th to 1/6th the volume in sugar, the juice of a lemon or lime or more for a great quantity, and bring to a boil; immediately reduce to a simmer for just a couple of minutes, turn off, and can.

  • Asparagus & Onion Tart

    Asparagus & Onion Tart

    Asparagus Onion Truffle Tart

    Asparagus Onion Truffle Tart

    You might notice from here on out that my dinnerware is increasing in attractiveness/quality. Gone are the 70’s Mikasa stoneware plates (re-purposed to the space we used to live in below our unit, where an office is nearly complete in renovation), hello nice new modern neutral white porcelain.

    This is also a new tart pan, hoping to make its public debut at a brunch or happy hour party, and this is the first tart it has produced.

    I’ll have an update on the container garden tomorrow, as I spent much of today buying and planting a few additional crops.

    Asparagus and Onion Tart

    For Tart Crust (Shamelessly taken from Smitten Kitchen who took it from elsewhere)

    1 1/4 cups flour
    1 tablespoon plus 2 teaspoons cornstarch
    1/4 teaspoon salt
    6 tablespoons butter, diced
    1 egg

    For Tart Filling

    1/2 lb asparagus, peeled and sliced on the diagonal
    1 large white or yellow onion, sliced in quarter rings
    2-3 T mascarpone cheese
    1 T truffle butter, 1 tsp truffle oil or heavy pinch truffle salt
    3 eggs
    1/2 C cream/milk or mixture thereof
    2 oz gruyere, comte, or other nice melting cheese
    1 T dijon or other high quality mustard (I used whole grain)
    1/4 tsp ground nutmeg
    salt & pepper
    1 T butter

    Preheat oven to 425. Heat the butter in a skillet and sautee at medium low the onions. When translucent (about 20-30 minutes) and beginning to brown, add the sliced/peeled asparagus. Meanwhile, make the tart crust. Cook the vegetables through, turn off the heat, add the truffle butter and mix, then leave to cool off.

    Mix the mascarpone (can substitute sour cream/creme fraiche too, or add it) and eggs together until the mascarpone is loosened. Add the cream/milk, nutmeg, salt and pepper.  Grate the comte or other cheese.

    Brush the tart shell with the mustard. Add the onion and asparagus, top with cheese evenly. Pour the egg mixture on top, evenly and bake for 20-30 minutes until filling is puffed and golden.

    Tart Crust

    Combine the dry items, then add the butter in small chunks and use a pastry cutter or your fingers (quickly) to make into fine meal/breadcrumb consistency. Add the egg and mix with a fork until it comes together, then roll it out on a floured surface to the shape you need for your tart pan. Refrigerate or pop in the freezer for 15-30 minutes until firmed up. Does not need to be baked ahead of filling/cooking.

    * A few notes:

    – Filling – if you have experience making tarts, quiches, etc, feel free to re-combine tasty creamy dairy items as needed with what’s on hand to make the liquid portion of the filling

    – Filling – if you prefer, you may leave the peeled asparagus un-sliced and arrange in lengths along the long pan, should you be using the same shape. It would make a pretty presentation for a brunch or otherwise.

  • Smitten Kitchen’s Zucchini and Ricotta Galette

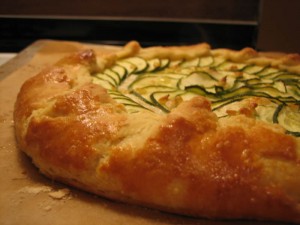
    Smitten Kitchen’s Zucchini and Ricotta Galette

    The recipe is here; I swapped out the ricotta for sheep’s ricotta, which I do whenever possible as a recipe calls for ricotta, swapped the mozzarella for a semi firm american cheese – Wagon Wheel also known as “batch” from cowgirl creamery, and swapped the sour cream in the crust for creme fraiche from cowgirl as well. Delicious!

  • Bday Dinner: Prosciutto Pluot, Halibut on Truffled Corn, Apricot Ricotta Tart

    Bday Dinner: Prosciutto Pluot, Halibut on Truffled Corn, Apricot Ricotta Tart

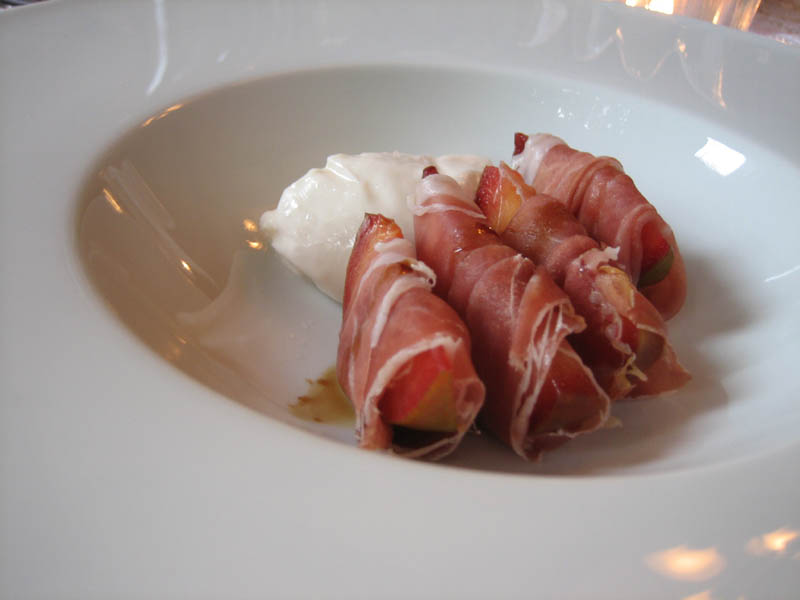
    prosciutto wrapped pluot with balsamico and burrata

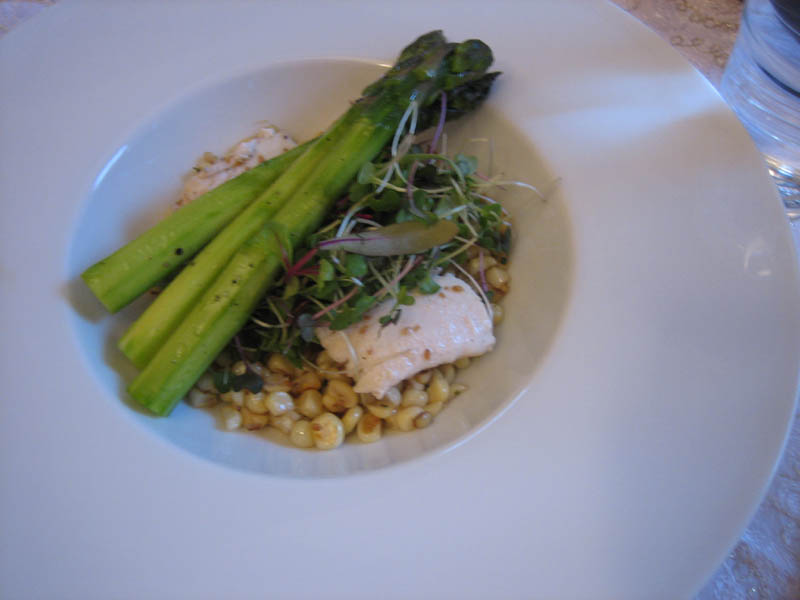
    halibut on truffled corn with microgreens and asparagus

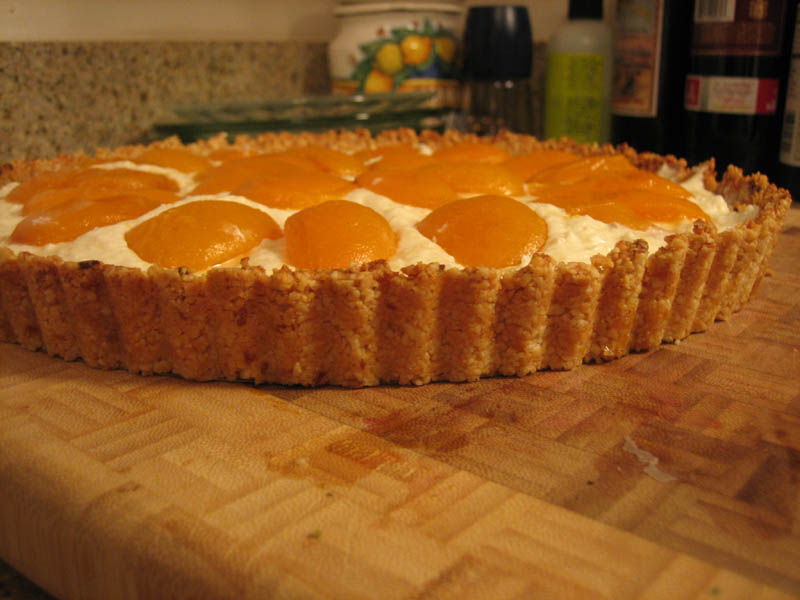
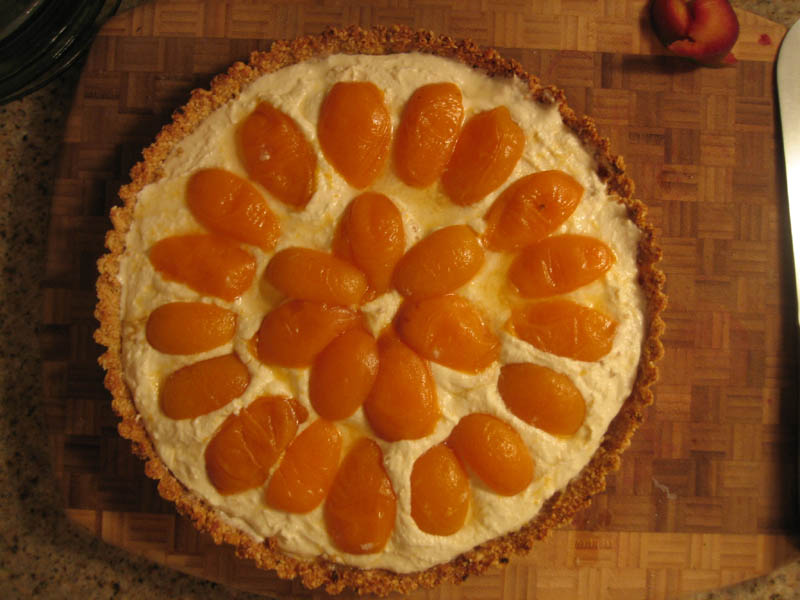
    Apricot Nut Ricotta Tart

    Prosciutto wrapped Pluot

    Simple–great fruit, slices of it, wrapped in very thin prosciutto, paired with a soft cheese like burrata in this case, or seasoned ricotta (season with olive oil or flavored olive oil, salt, pepper), drizzled with aged balsamic vinegar.

    Halibut on Truffled Corn

    I’ve made this as an appetizer as well, and substituted asparagus shavings steamed lightly for the asparagus itself, and served smaller pieces of fish.

    For 4

    1.3 lb halibut fillet, skinned
    3-4 ears fresh corn
    1 pack rainbow microgreens
    12 asparagus spears (or 5 if you are shaving them)
    fresh thyme
    truffle oil
    hazelnut or walnut oil; if unavailable substitute mild, high heat oil – a few T
    toasted sesame oil – 1 tsp
    gomashi – ground salt and toasted sesame seeds
    salt & pepper

    You’ll need two skillets.

    Lightly peel the asparagus and place on parchment paper. Dress lightly with olive oil or flavored olive oil (lemon, clementine, etc; alternatively add lemon or other citrus zest). Wrap peeled asparagus in parchment paper to enclose, and place in oven at 350.

    Heat 1-2 T nut oil and toasted sesame oil in nonstick skillet or skillet with good sides for flipping at medium high heat. When hot, add corn. When corn begins to color, reduce heat to medium and add thyme. Continue flipping or stirring every 30 seconds to 1 min.

    Meanwhile, heat a few T of oil in a pan for the halibut at medium high/high heat. Use enough to easily coat the bottom of the pan. Dress halibut fillets in gomashi and a dash of fresh ground pepper. Top side down into the pan first when oil is hot. When 2/3rds cooked, flip.

    When corn is finished cooking, turn off heat and add 1-2 tsp truffle oil, mix. Season with salt and pepper.

    Remove asparagus from oven. Total cooking time for most asparagus will be about 15-20 minutes, but check it as ovens vary.

    Assemble as pictured on top of the corn; corn, halibut, microgreens, asparagus.

    Apricot Tart with Ricotta Marscapone Nut crust

    Apricot Ricotta Tart

    3-4 cups nuts of any combination or variety: blanched/blanched slivered almonds, raw cashews, macadamias
    5 dried apricots
    2 T melted butter
    6 fresh apricots
    1/2 cup granulated sugar
    1/2 cup water
    1 cup mascarpone cheese
    8 oz ricotta cheese (preferably sheep’s milk)
    orange blossom water
    honey
    benedictine or other brandy/liquor

    For the Crust: Chop finely the dried apricots. In a food processor, blend nuts and dried apricots until fine meal is formed. Add 2 T honey, 2 T melted butter and blend until sticky ball is formed. If too sticky, add more nuts. Should be able to hold together.

    In a 9 1/2 inch tart pan, press out the crust evenly and then place in freezer or refrigerator to set for at least 30 minutes.

    For the Filling: Mix the ricotta, marscapone, 1-2 tsp orange blossom water, 2T honey and 2-3T benedictine/brandy for the filling. Chill.

    For the Topping: Wash and quarter the apricots. Start a simple syrup of 1/2 C sugar and 1/2 C water in a large sautee pan. When made, add the apricot quarters and reduce heat to simmer, turning occasionally until fruit plumps but does not fall apart. Remove pieces onto a cool platter as they finish cooking. After fruit is removed, gently raise heat to create apricot caramel.

    Bake the tart crust at 350 for 15 minutes until coloring golden. Remove and let cool thoroughly or pop into freezer/oven to bring it down.

    Fill with ricotta mixture, top decoratively with apricot slices. If you want the topping to be glossy, melt some red currant jelly in a pan and brush on top. It will dry clear as pastries from a bakery.

  • NY Style Cheesecake: What I did this Weekend

    NY Style Cheesecake: What I did this Weekend

    Chocolate Chip New York Style Cheese Cake

    Epic! Bringer of many delights, apple of the world’s eye, greatest feat which mankind has eaten…the cheesecake. Those are chocolate chips my friend, consider it a bonus.

  • Vanilla-Mint Pu-erh Tea Ice Cream from Rishi Tea & Rishi Teas

    Vanilla-Mint Pu-erh Tea Ice Cream from Rishi Tea & Rishi Teas

    pu-erh ice cream made with Rishi Tea Vanilla Mint Pu-Erh

    Some regular readers may have noticed a certain obsession lately, namely that my creativity in the kitchen with concerns to ice cream has been largely centered around tea as of late. In terms of flavor, this is my favorite ice cream tea to date.

    This may not come as a surprise to anyone who makes ice cream at home, but I have finally concluded that anything less than 50% cream and 50% half & half is just not creamy enough to make a soft, scoop-able, delicious ice cream at home. The photo above was made with 100% half and half, and while the taste was delicious, the texture was lacking. So, I have amended my recipe below for your future success.

    1 oz Rishi Vanilla Mint Pu-Ehr Organic Tea
    1/2 pint organic half-and-half
    1/2 pint organic whole cream (I recommend Straus Family Creamery for your ice cream dairy products)
    1/3 cup sugar + 1/3 cup water
    Additional boiling water

    Combine the sugar and water and bring to the beginning of a simmer over heat to make a simple syrup. Turn off heat and reserve. Does not have to be cool to use.

    In a medium to large metal or glass bowl add the tea, but reserve from the 1oz enough for one pot–you should brew it when you eat the ice cream for a hot & cold experience. Pour enough boiling water over the tea to moisten all of it and let brew 1-2 minutes.

    At 1-2 minutes, add the half and half and the cream, then the simple syrup. Cover and let stand in refrigerator for at least 12 hours and up to 36. Optional: let stand at room temperature for 30 min-1hour for more intense flavoring, before placing in refrigerator.

    When mixture is fully chilled, follow instructions for your ice cream machine being sure to strain the mixture as you pour it into the machine.

    As a tangent, the folks at Rishi Tea are really down to earth. It came as a bit of a surprise to me that they’ve been around for more than 10 years, because they really run as a small, local company simply doing good business, and they have some really great products. Like my friend P at Red Blossom, they source their own teas and have personal relationships with the growers, and have some great products they offer for wholesale–so you can likely find their products locally if you prefer not to order online.

    If you enjoy less traditional teas such as blends or fruit infusions but appreciate excellent quality, for example, this vanilla mint blend, Rishi is a great source. I also enjoyed their “iron goddess” oolong, but as a moderately experienced oolong drinker (read: I have no right to be snobby and am only moderately more exposed to excellent teas than the next person), I’d personally return specifically for the flavored teas and look forward to experimenting with more of them in cuisine as well (plum oolong dashi with umeboshi-pork roll and shiso?? just an idea).

    Come to think of it, it’s pretty much summer, so some flavored ice tea could be in order for back yard get-togethers, and they seem to have some tasty options.

  • Spring in San Francisco & No Posts in December 2009

    Spring in San Francisco & No Posts in December 2009

    Right now, It’s clearly spring in San Francisco.

    I’m enjoying seeing new leaves pop onto the maple every day, filtering light to make it seem like it’s golden hour all morning long.  A pair of bluejays (or some kind of blue birds) have built a nest in one of our lemon trees and spend the morning chasing each other between the trees while we eat waffles. I like to notice the sunshine as it moves to the others side of the house throughout the day. I sound like an old lady but I really like being here, cooking, eating, reading these days.

    People ask me what I’m doing on the weekend and lately I’ve replied that I hope I’m doing nothing.

    You may have noticed that there aren’t any posts in December 2009. This is for a few reasons.

    1) I was busy with work, closing out a year and fighting for a promotion which I ended up getting
    2) I moved. Yes! You may recall that I had a rather insufficient kitchen. Well, as of December, no more!
    3) I was out of town. It’s December. People go places. Forgive me.
    4) I was thinking about where to place my Jonah & The Whale mobile in the new place. I purchased this as really the only momento of my very early trip with Y to Paris. It’s been sitting waiting to come out for two years. I settled on the open pantry which you can see from the kitchen and the dining room, which I also painted a pretty sherbert orange that does not photograph very well close up.

  • Pici pasta with chard and sundried tomato pesto

    Pici pasta with chard and sundried tomato pesto

    Pici cooked, and simmered a few minutes in a sundried tomato & oil reduction/pesto, with a bit of fresh swiss chard (red chard).

  • Golden Monkey Ice Cream (Black Tea Ice Cream)

    Golden Monkey Ice Cream (Black Tea Ice Cream)

    Not too long ago I was visiting Peter at Red Blossom Tea Company–I was going on a little about the ice cream maker I had just purchased and not really had a chance to use yet. P’s sister, Alice, jumped in talking about some ice cream she had made with their Golden Monkey tea. Now, Alice has taste in food. So I shaped up and listened. And I got sent home with some tea to make the magic, along with some instructions which I’ve re-posted here.

    1 qt Strauss family creamery whole milk (or other good quality organic dairy)
    or
    1 pt whole milk 1 pt heavy whipping cream (for softer, creamier result)
    2/3 C sugar
    2/3 C water
    2 T mirin
    ~1 C (4-5 large tea bags) loose leaf high quality organic Golden Monkey or other organic black tea, stuffed into large tea bags (or prepare to have a messy straining process, that’s fine too)

    Bring 1-2 C of the milk or cream to a steeping temperature (about 195 degrees, not simmering yet) and add the tea bags. When milk begins to color, turn heat off and pour tea bags and steeped milk into container with the rest of the milk. Reserve for 2-4 days in the refrigerator, shaking/turning to mix once in a while. This part of the process is important to get the infusion process going.

    At the same time, heat the water and sugar together and bring to a light simmer, cooking until beginning to color a tea color. Add mirin and remove from heat immediately. Mix, and add to milk mixture.

    Use your ice cream maker as directed.